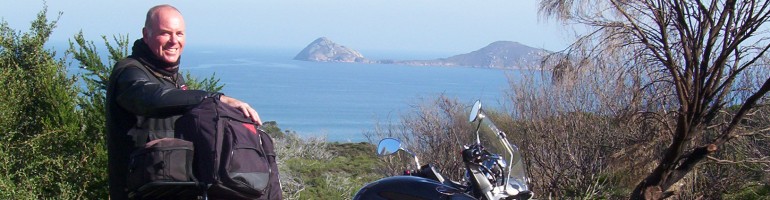
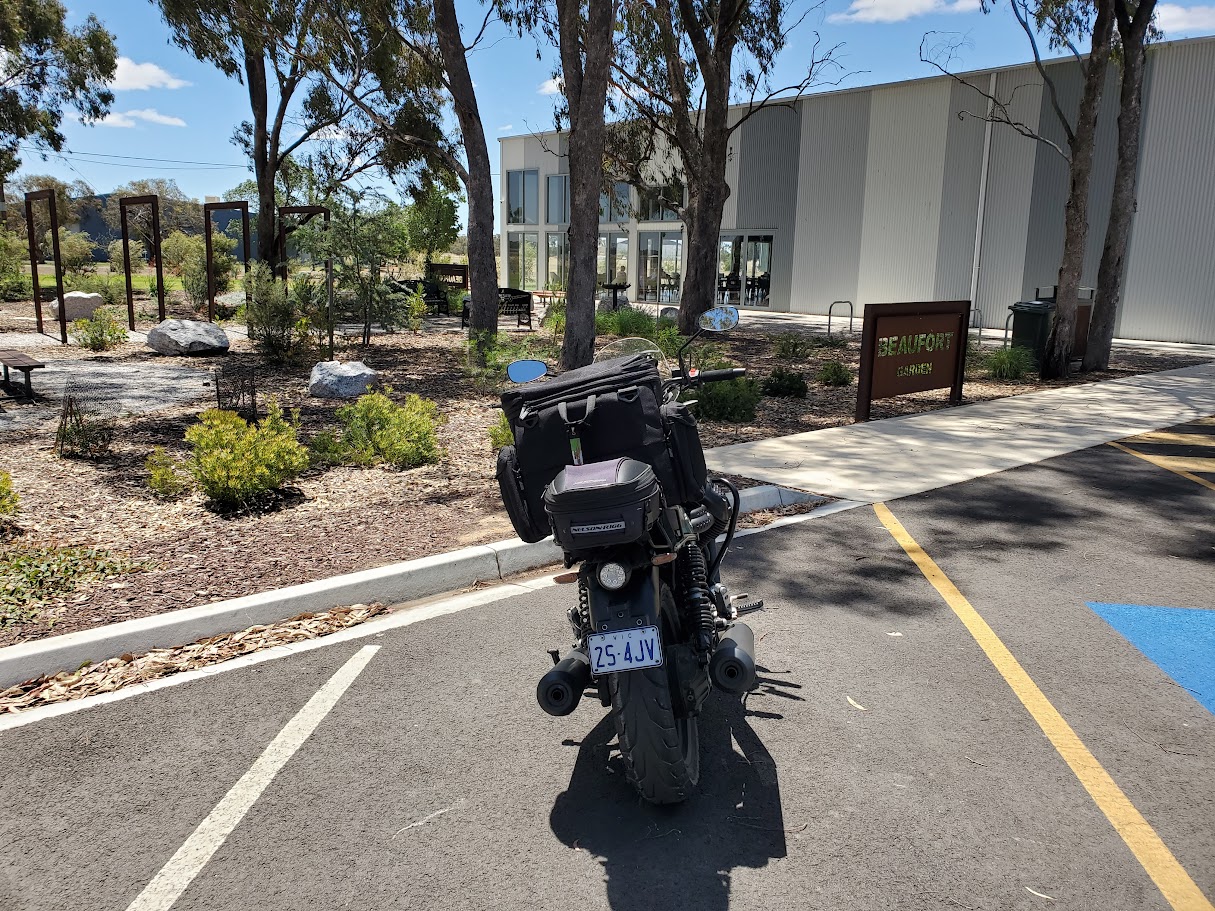
Good weather so I took a few days to run around northern Victoria and the Riverina of southern NSW. Out to Wangaratta then cut across through Tungamah and Nathalia – stopped for lunch – and crossed the Murray River (the border between Victoria and NSW) at Barmah.
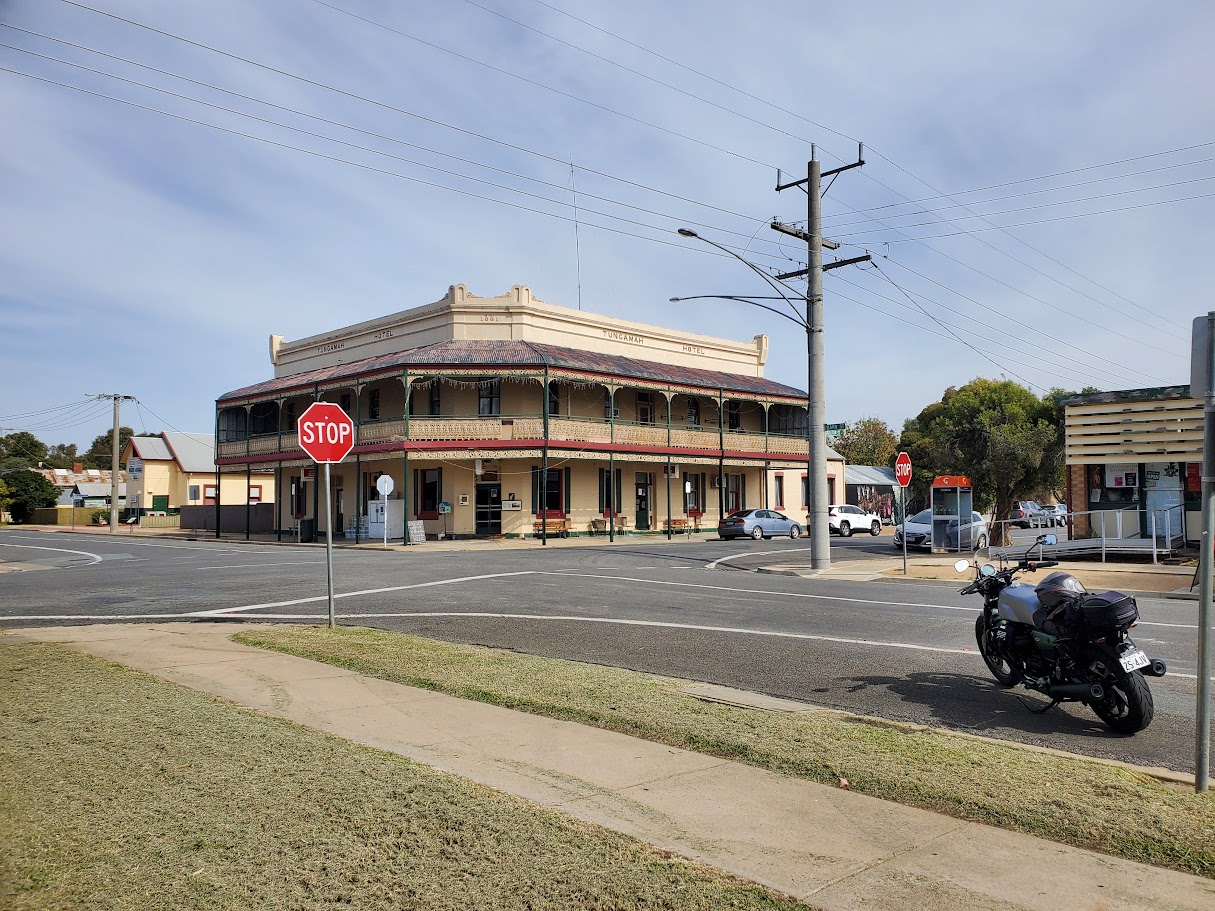
The Tungamah Hotel.
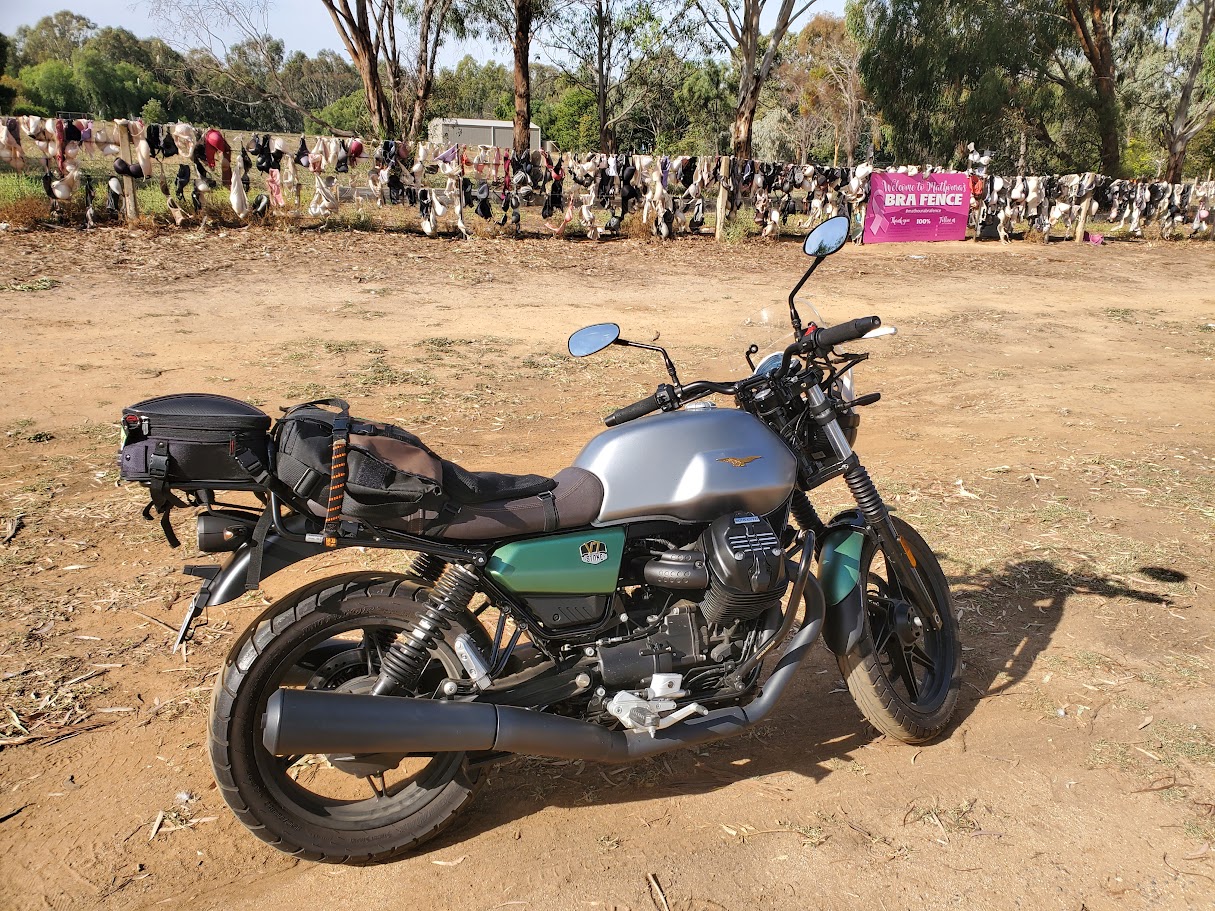
A pleasant run up through Mathoura to Deniliquin, my stop for the night.
The bra fence at Mathoura.
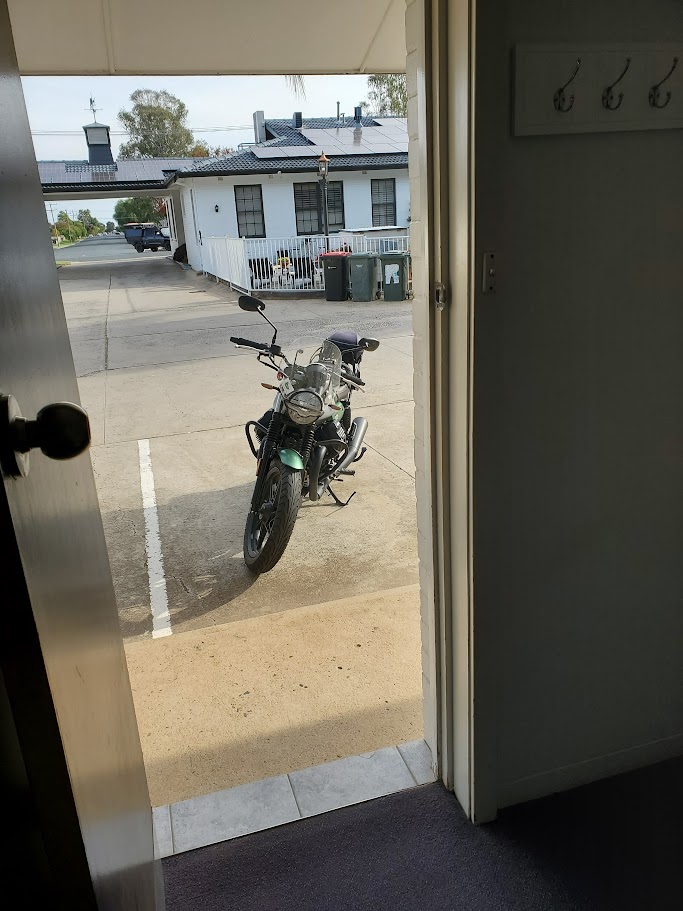
Booked into the Coach House Motel for the night. Comfortable and a short walk into town. I had dinner at the motel and a few beers, too.
The Coach House Motel.
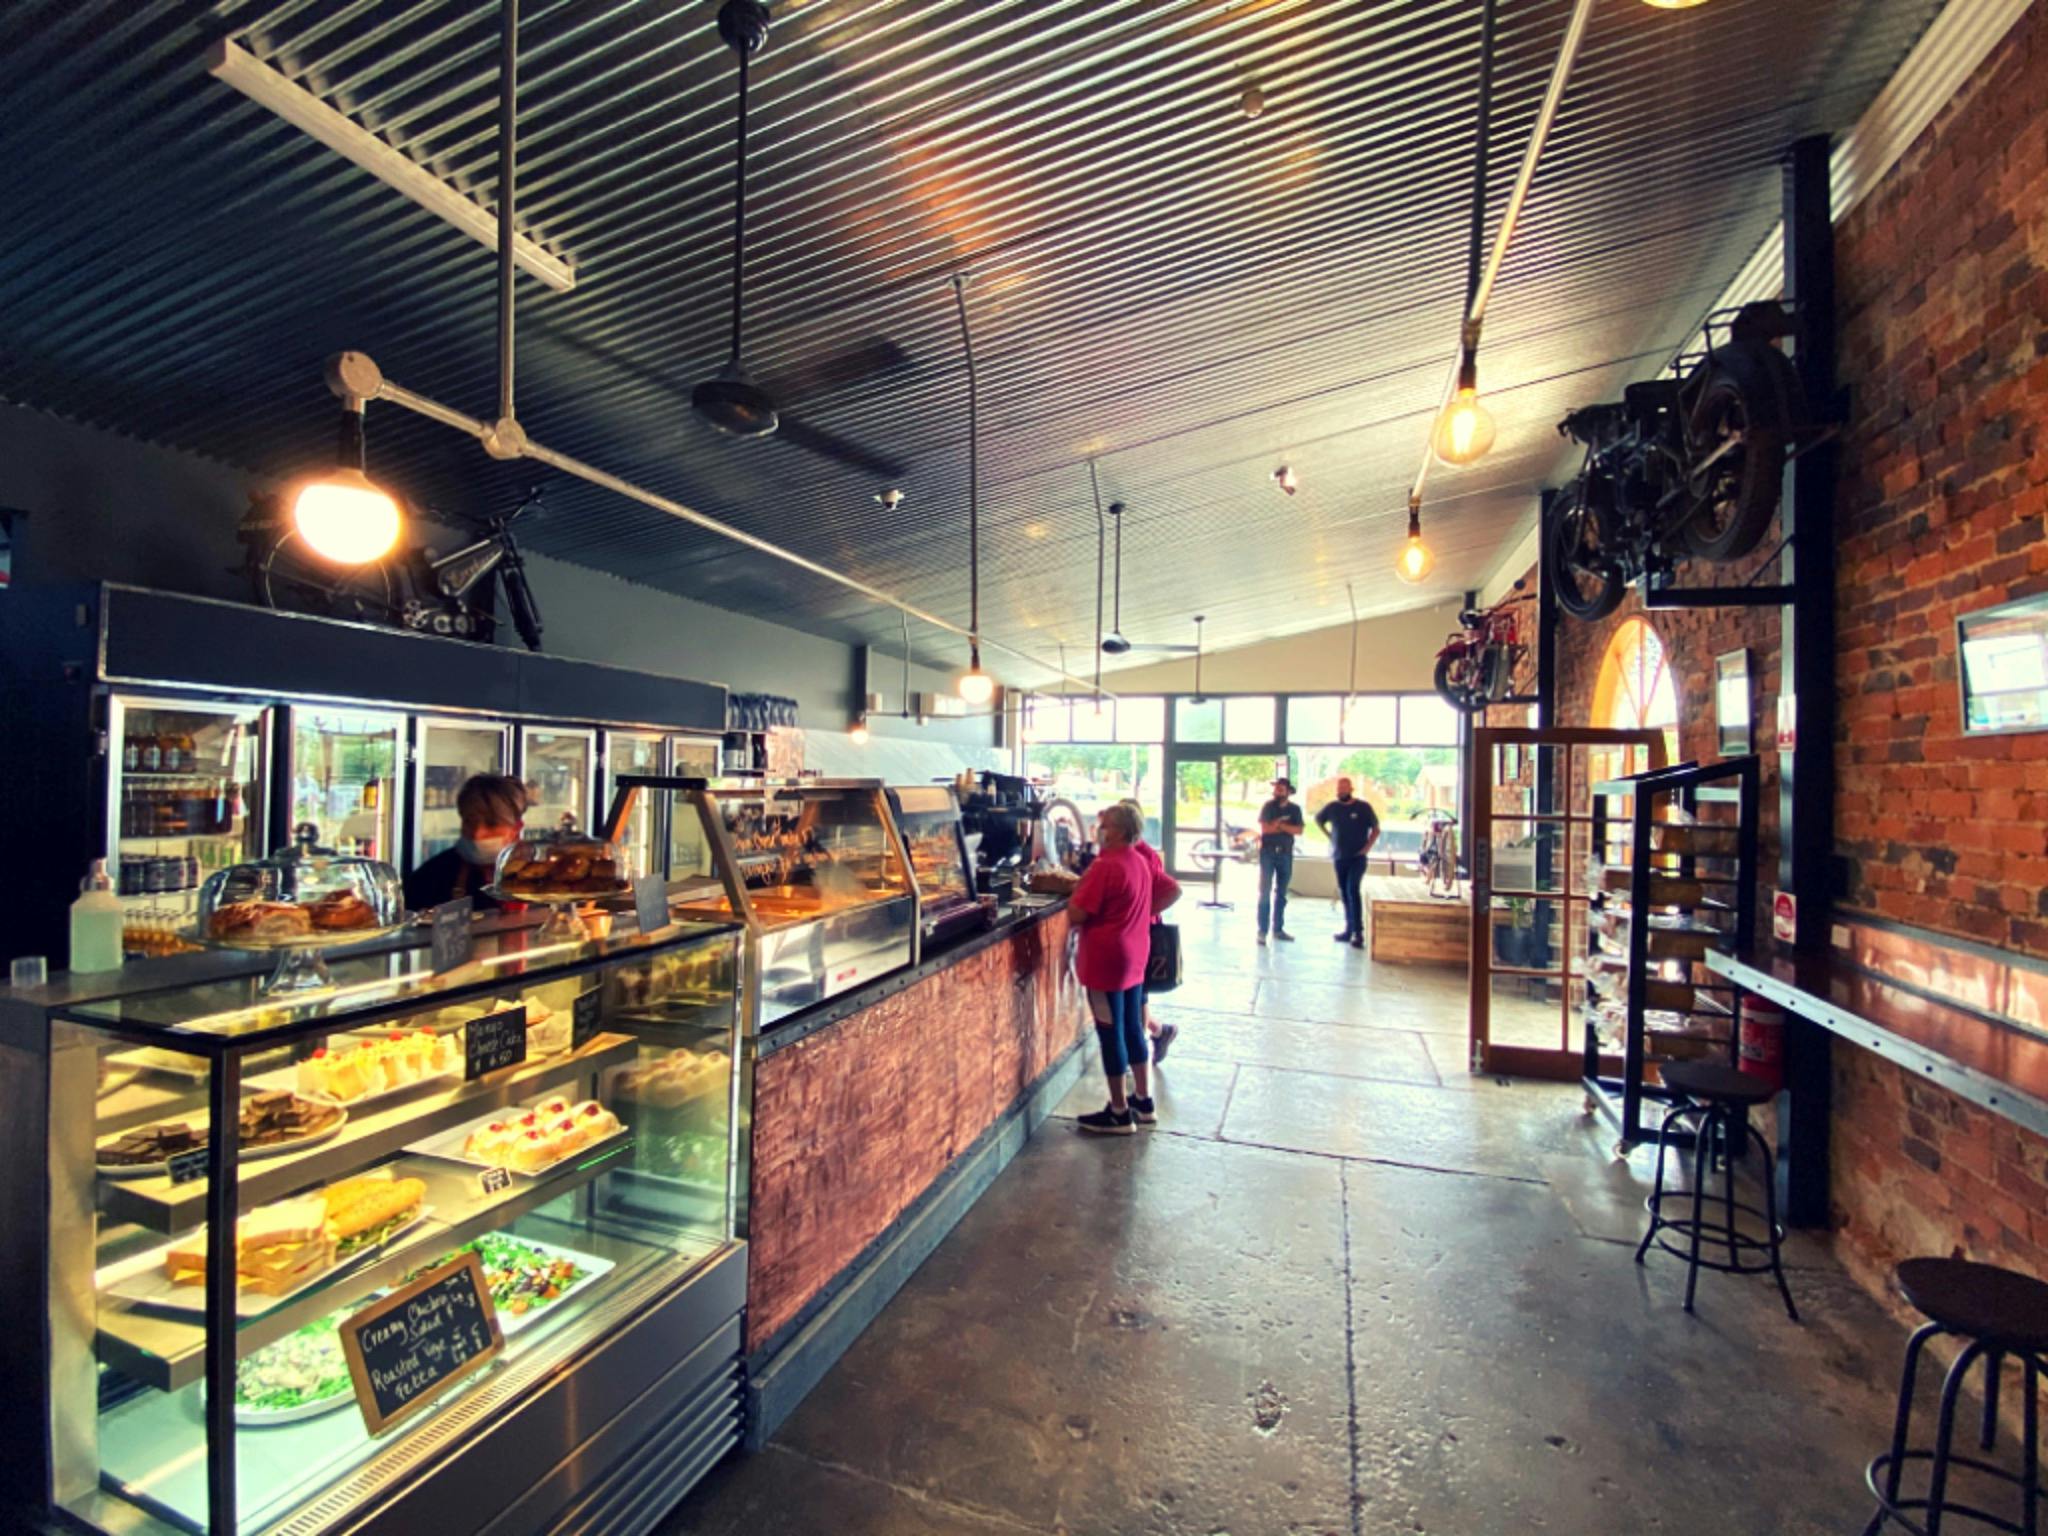
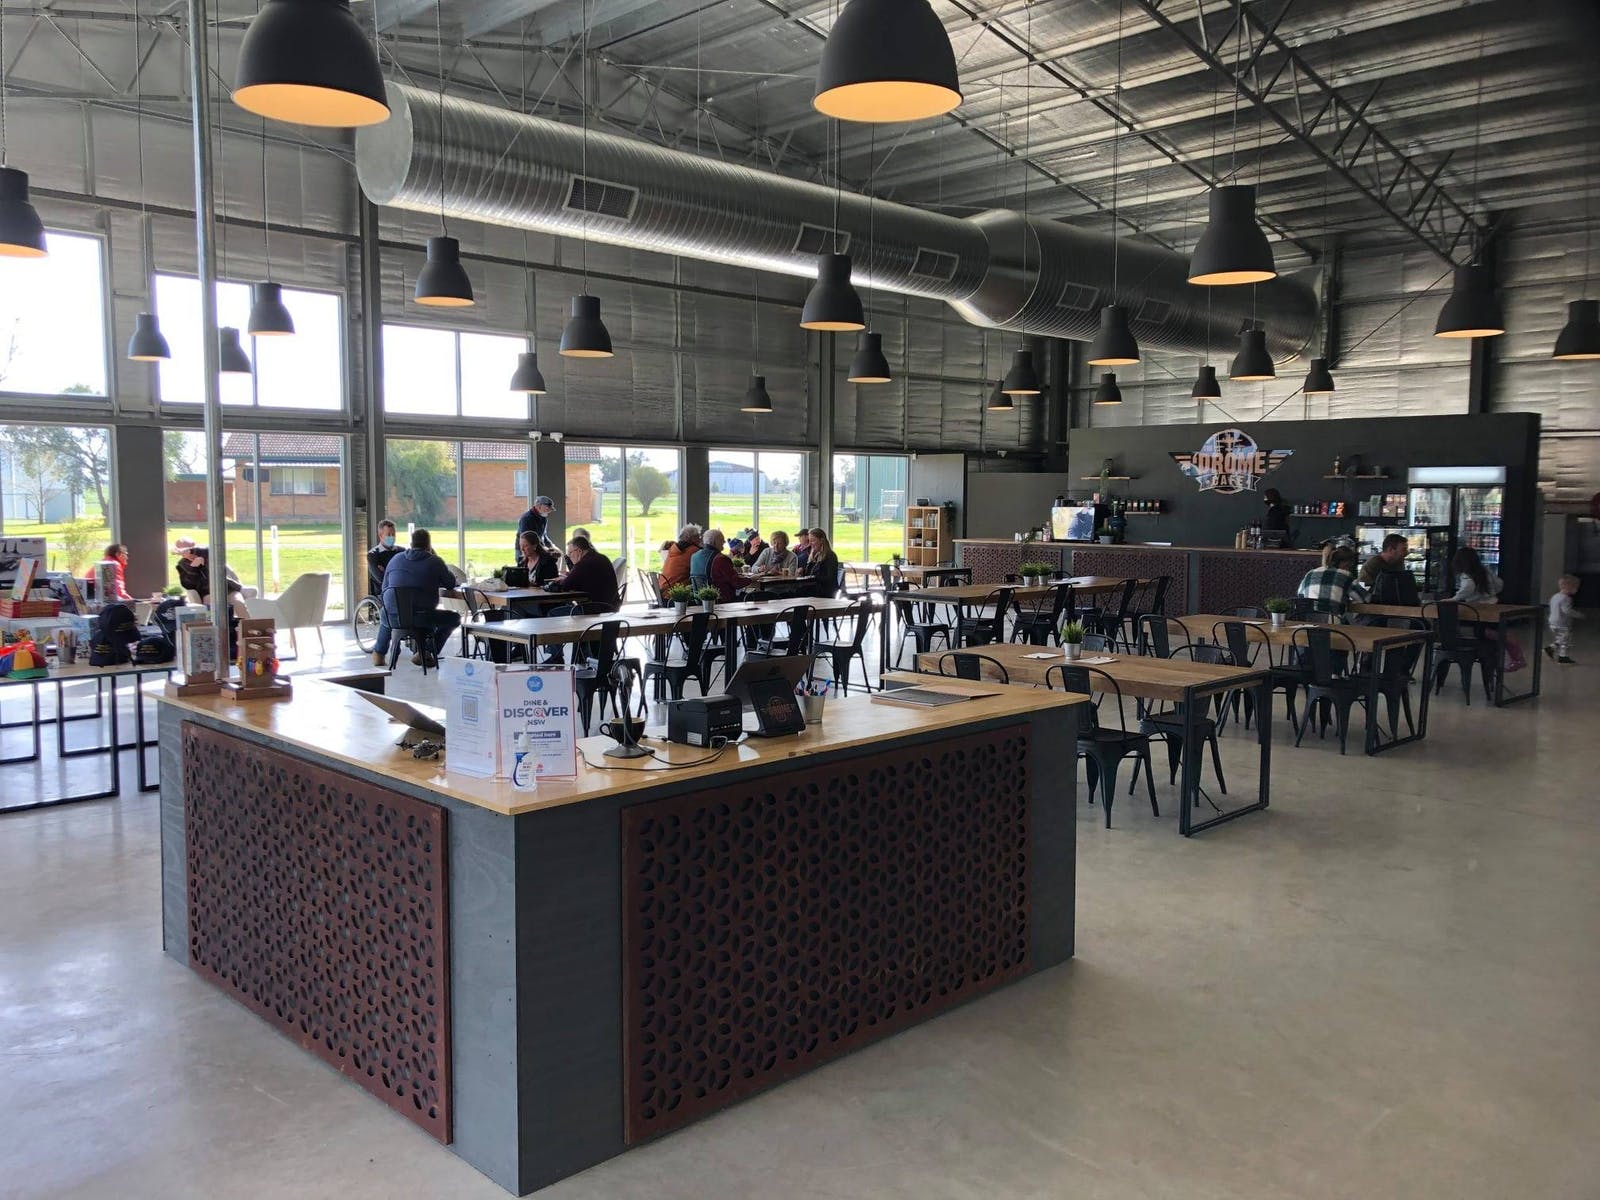
The V7 was running beautifully as I hot-footed my way across to Blighty, Finlay and Berigan. A lot of irrigation out here. Down to Corowa and a stop at Rutherglen for lunch at Caffeine n Machine.
Caffien n Machine: cafe, bakery and vintage bikes.
I’ve owned my V7 850 Centenario for a few years, and the single, most frustrating shortcoming has been the fuel-mapping. It has a distinct gap or hesitation in the 3-4000rpm area, mainly in 3rd when cold and tooling through town to get out onto the open road. Once warmed up, it’s barely detectable – but I can still feel it! Even in 5th and 6th it’s apparent when the revs drop down. Seems worse in summer. Something to do with the Euro 5 requirements.
The Beetle map on my Breva 1100 made a big difference to its mapping problem. Unfortunately, it seems that a Beetle map is not possible for the V7 850. But rescue is at hand from UpMap in Parma, Italy.
I couldn’t find an Australian outlet so I bought online directly from UpMap, which had a discount over Christmas (which covered the pricey freight cost). It cost me $550 (plus $25 international transaction fee!). That’s a lot of money but I was fed up with the “hesitation” issue.
I watched a few Youtube videos of bods using UpMap on their Aprilias. Thus fortified, I ordered it on the 5th January and the package arrived one week later, on Tuesday 13th. That’s very quick in my experience. Additionally, their sales manager, Simone Di Grande, responded immediately (with the 10-hour time difference) to my queries. The package included the T800 UpMap device and the appropriate cable for the V7. With the UpMap app downloaded to my phone from Playstore, the T800 can be accessed by Bluetooth and the bike’s ECU can be reconfigured.
So I got stuck in. The whole process worked smoothly, following prompts on the app. It recognises the bike, lists the maps that could be used and their prices -the other maps are for various exhaust and racing options. The map I bought in the original transaction is listed as free. Press a few prompts and she’s uploaded!
It was too hot to take her for a test run. But I started her up and immediately it was apparent that the idle was smoother.
I took her for a blat the next morning. Beautiful, smooth acceleration, no hesitation through the whole rev range even when I dropped the revs down and rode in high gear. It was so pleasing to achieve such an outcome. A bit expensive but worth it.
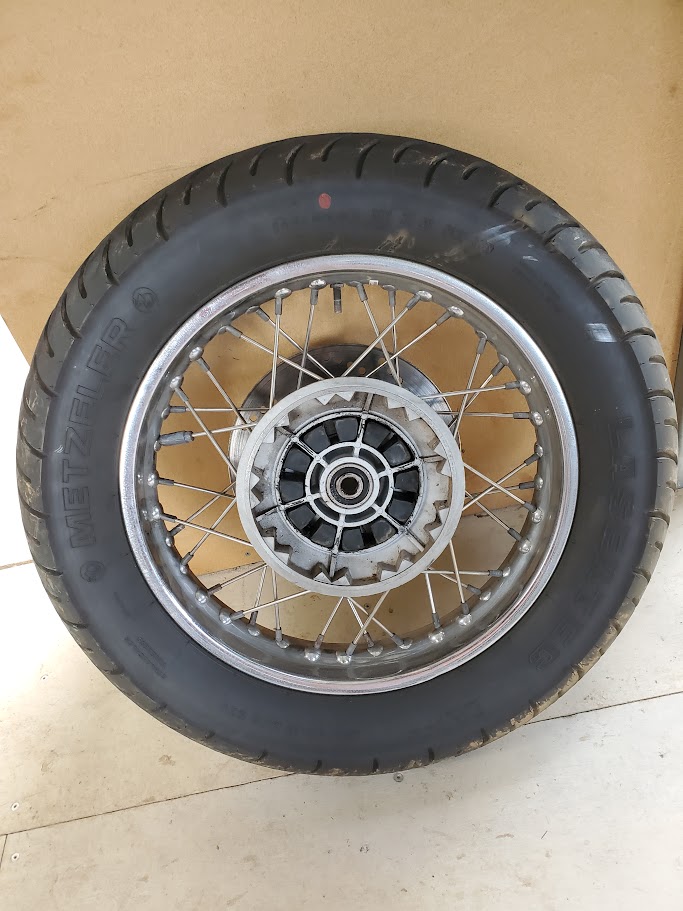
In February 2026, the Nevada will go in for a roadworthy so I can register under the Club Permit scheme. This allows the bike to ridden as a classic or historic bike with lower registration costs. Final job was to remove the wheels and have new tyres put on.
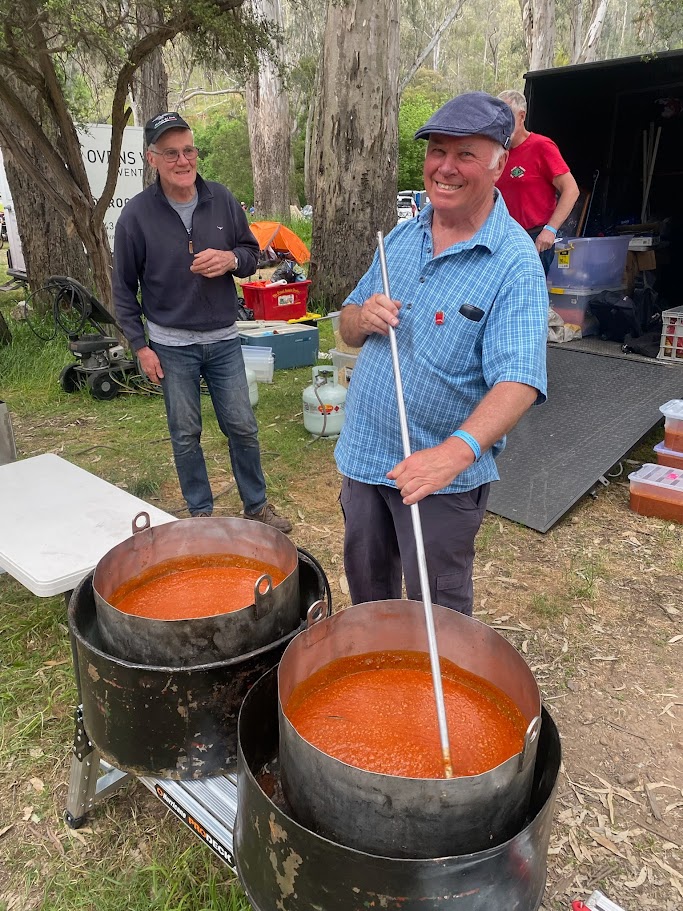
During the year I attended the Spaghetti Rally, the Moto Guzzi Club of Victoria’s annual campout.
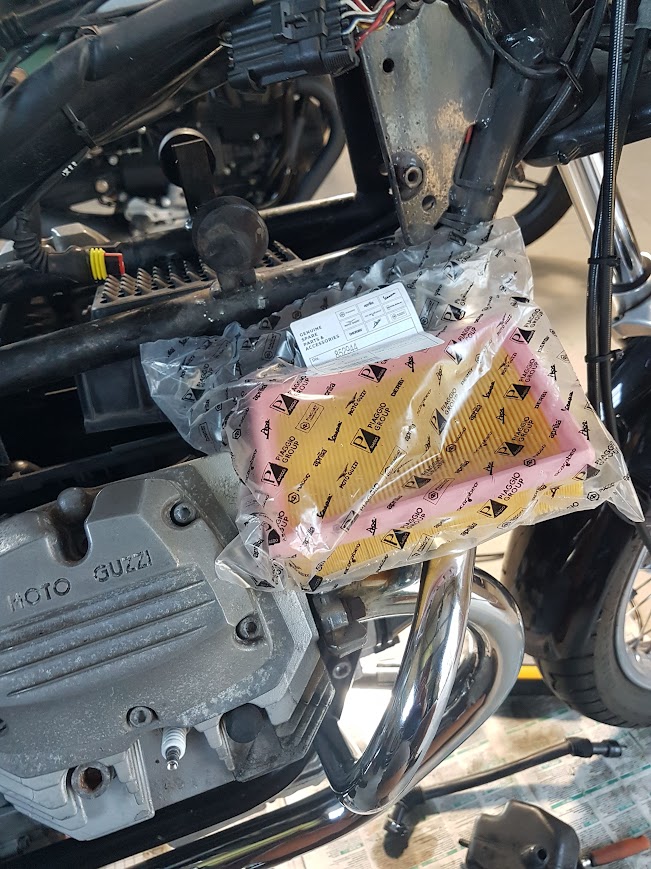
A couple of months ago I bought an unloved 2001 Nevada from a deceased estate. The Guzzi had been de-registered in 2019 and not used since. It started and I had a quick ride, noting the speedo didn’t work. The right-hand side panel was missing. It had 20 years of servicing records, manuals and paperwork. I gave it a clean and it came up very well. I ordered air filter, oil filter, plugs, washers, gaskets and a Veglia speedo tang for the front wheel speedo drive from Thunderbikes in Perth (which, as usual, arrived promptly). I also ordered from Stein Dinse in Germany a RHS panel, parts book, and an odometer reset knob.
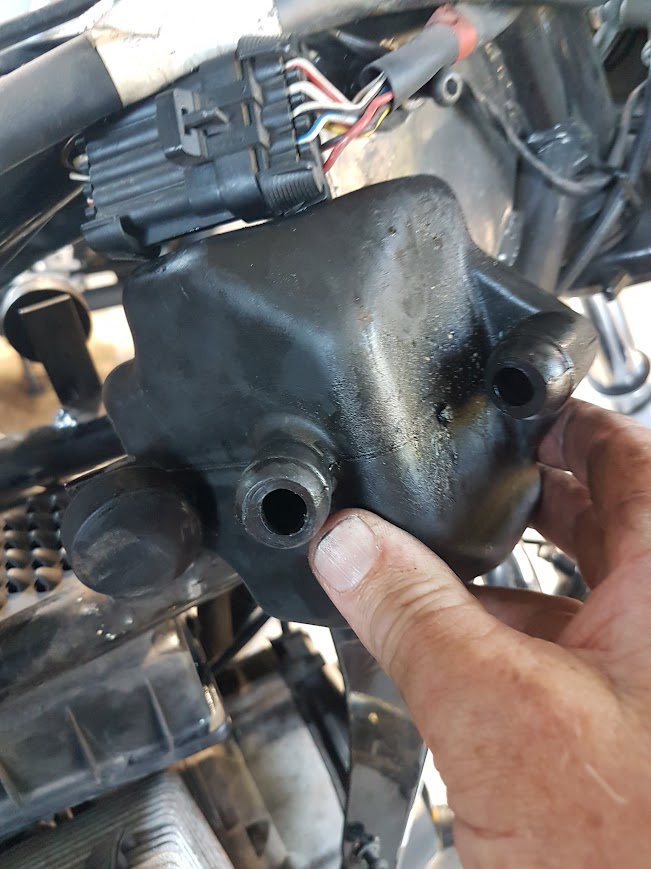
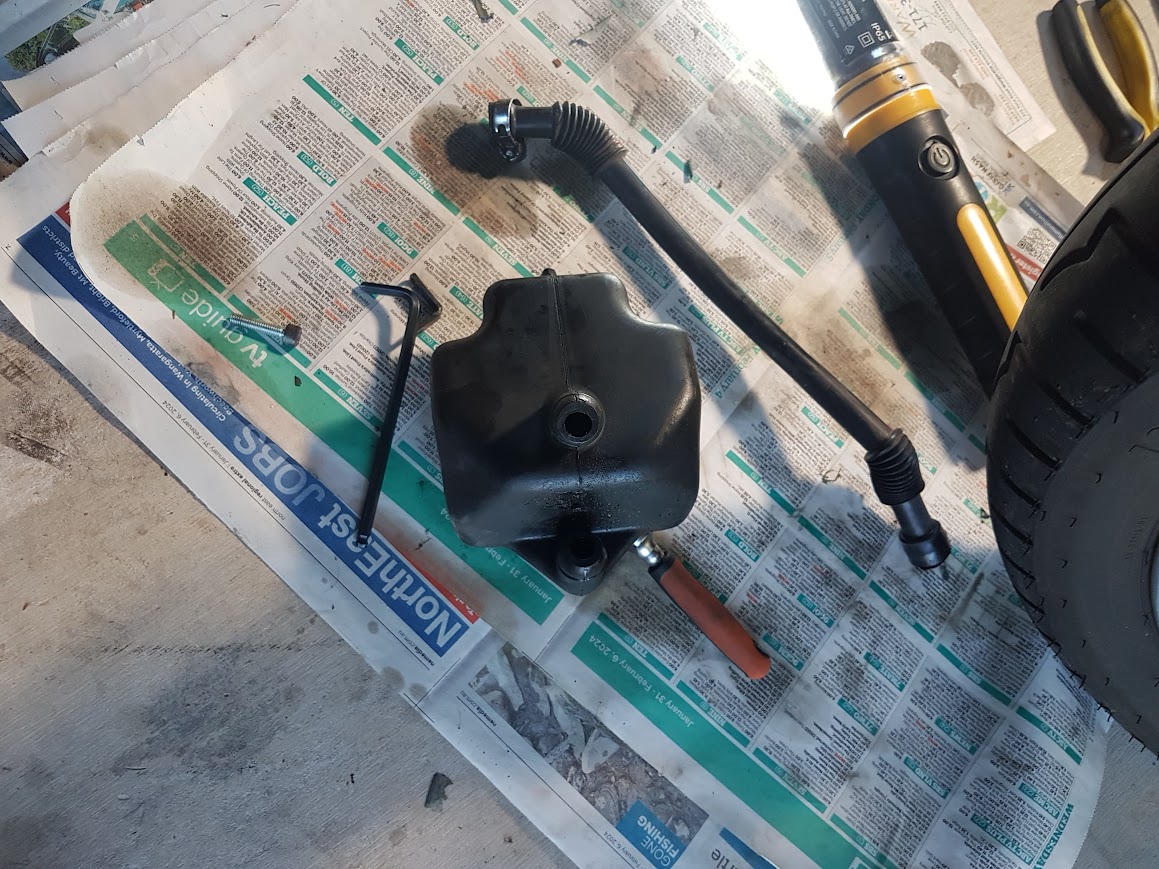
Next job was to give it a service. I drained the oil and removed the oil filter. I decided to remove the sump as well and give it a clean out. The oil was thick and gooey. There was some form of sludge stuck to part of the sump which I removed with degreaser and a rag.
Moved on and serviced the gear box and rear drive.
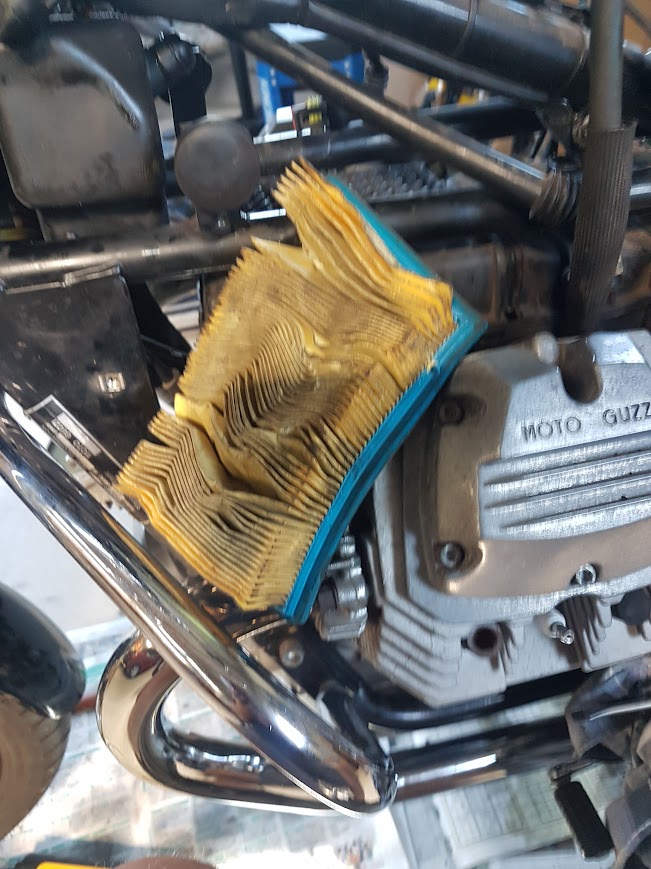
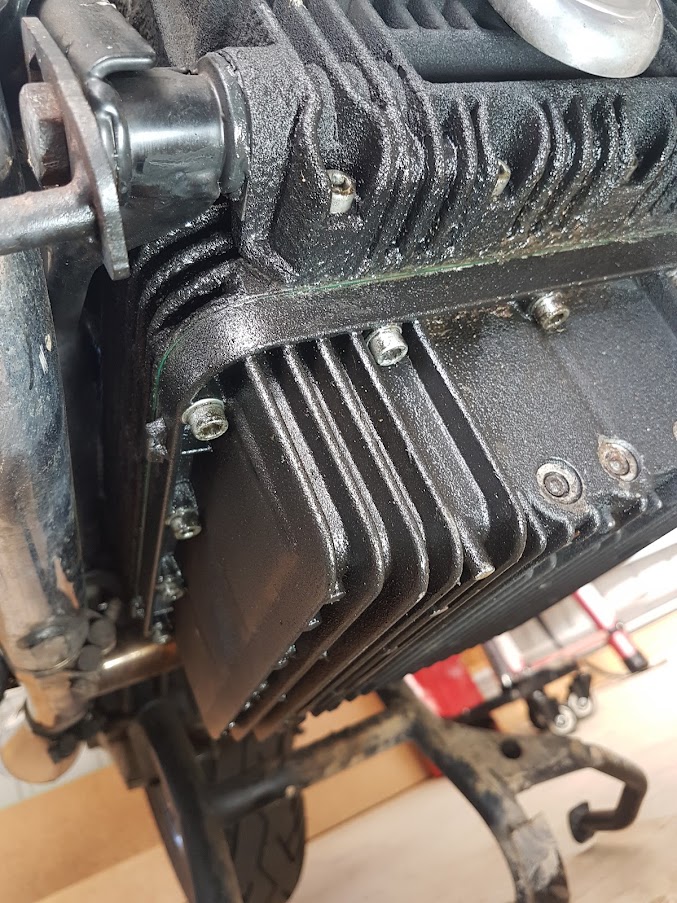
In the service records, I couldn’t find any mention of the air cleaner having been replaced. I wasn’t surprised. I’ve previously read that replacing the air filter was a nightmare. But I was going to, and a YouTube search revealed this: Moto Guzzi Nevada 750 air filter change. Frankly, I couldn’t have done it without viewing the video.
She was a bloody tight fit, and I toyed with the idea of cutting the filter lid in half with a Dremel. But the filter went in eventually, with much patience and swearing. At the factory, they must have assembled the frame and the engine with the filter in situ!
While the tank was off, I replaced the spark plugs and adjusted the tappets. The exhaust gaps were a bit tight, which was also my experience with my wife’s Breva 750 – the exhaust gaps seem to tighten up.
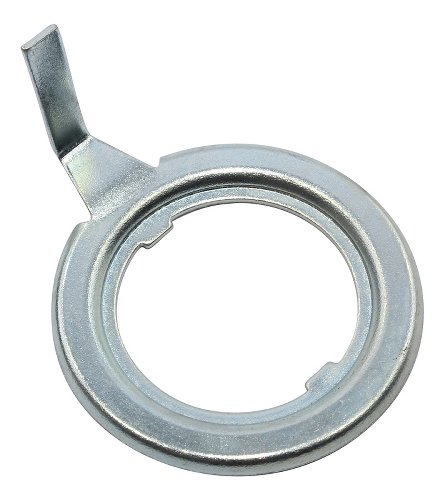
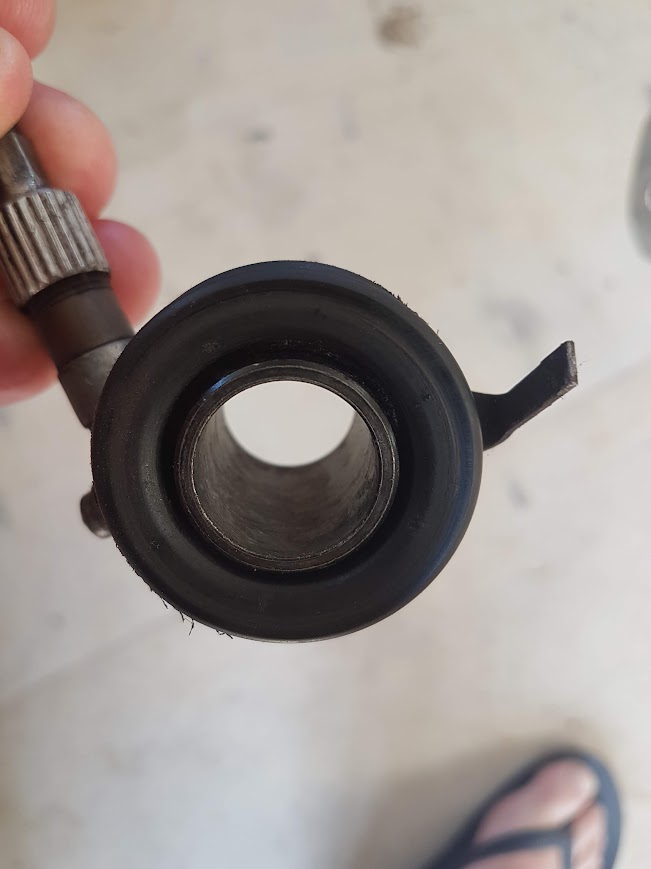
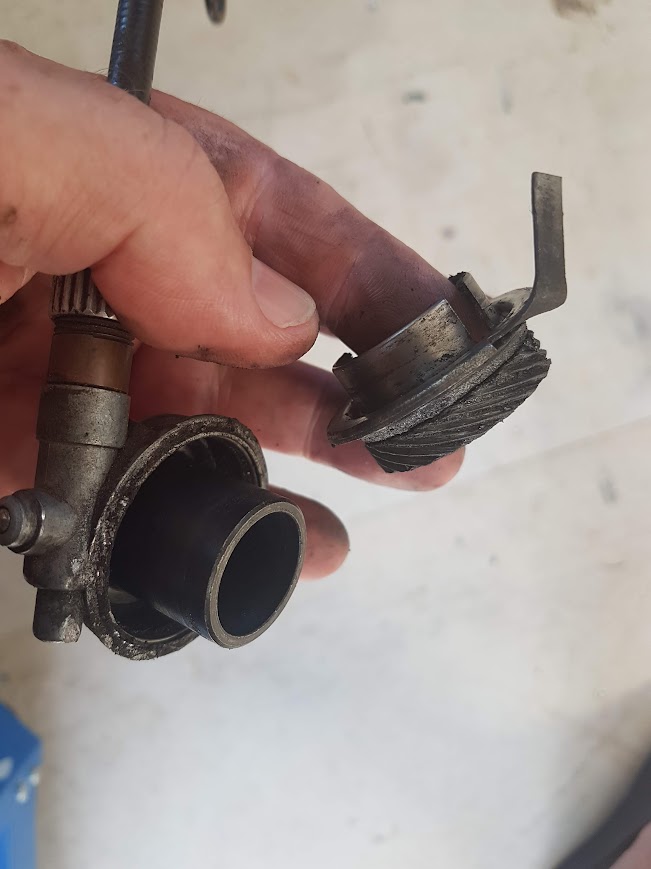
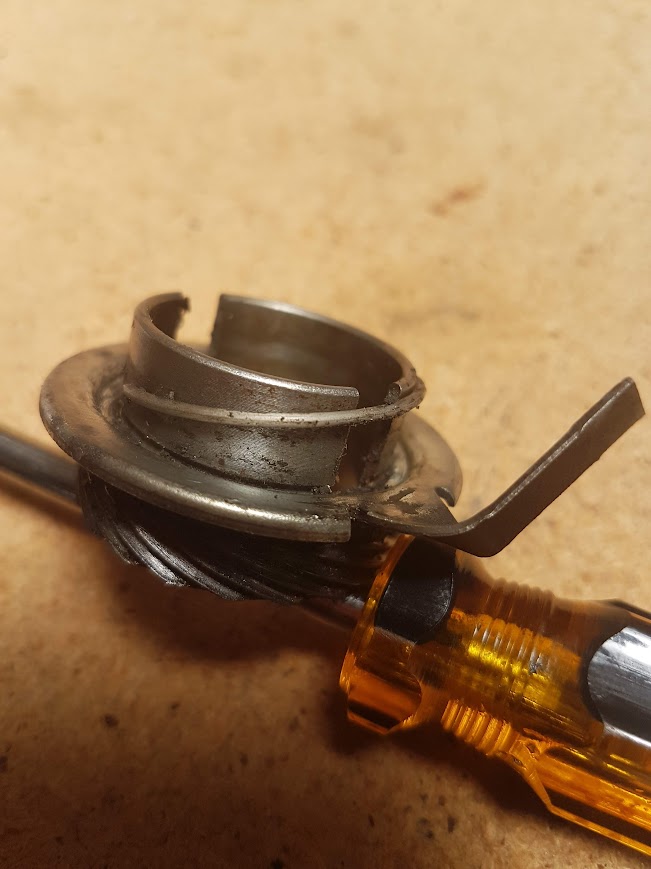
I loosened the front wheel bolts and removed the brake callipers, jacked up the Nevada a smidgeon, removed the front wheel and the speedo mechanism. The speedo tang had definitely seen better days.
I replaced the tang, after finding the circlip, and gave the mechanism a good greasing. I notice that there’s a grease nipple there for regular servicing (which it probably doesn’t get). Replacing the wheel, I gave it a good spin and was gratified to see the speedo register. Screwed in the new trip meter reset knob and was able to rotate the trip meter (which I use to judge fuel usage).
Next, must replace the brake fluid. The rear brake seems low.
I purchased a set of Hepco-Becker crash bars for my V7-850 Centenario. Despite an expected delay until December, they arrived quick smart in early November. I checked that all the parts were there and read the installation instructions. I was a bit worried about having to remove the bottom engine support bar in case the frame/engine moved. But, in for a penny, in for a pound…
I followed the directions mostly. They said to remove the frame bolts on either side AND remove the engine support bar at the same time. I didn’t like that idea, so removed the frame bolts and attached the centre part of the crash bars first. Loosely tightened up the four bolts for the time being.
It became evident that the horn was in the way, so I removed it.
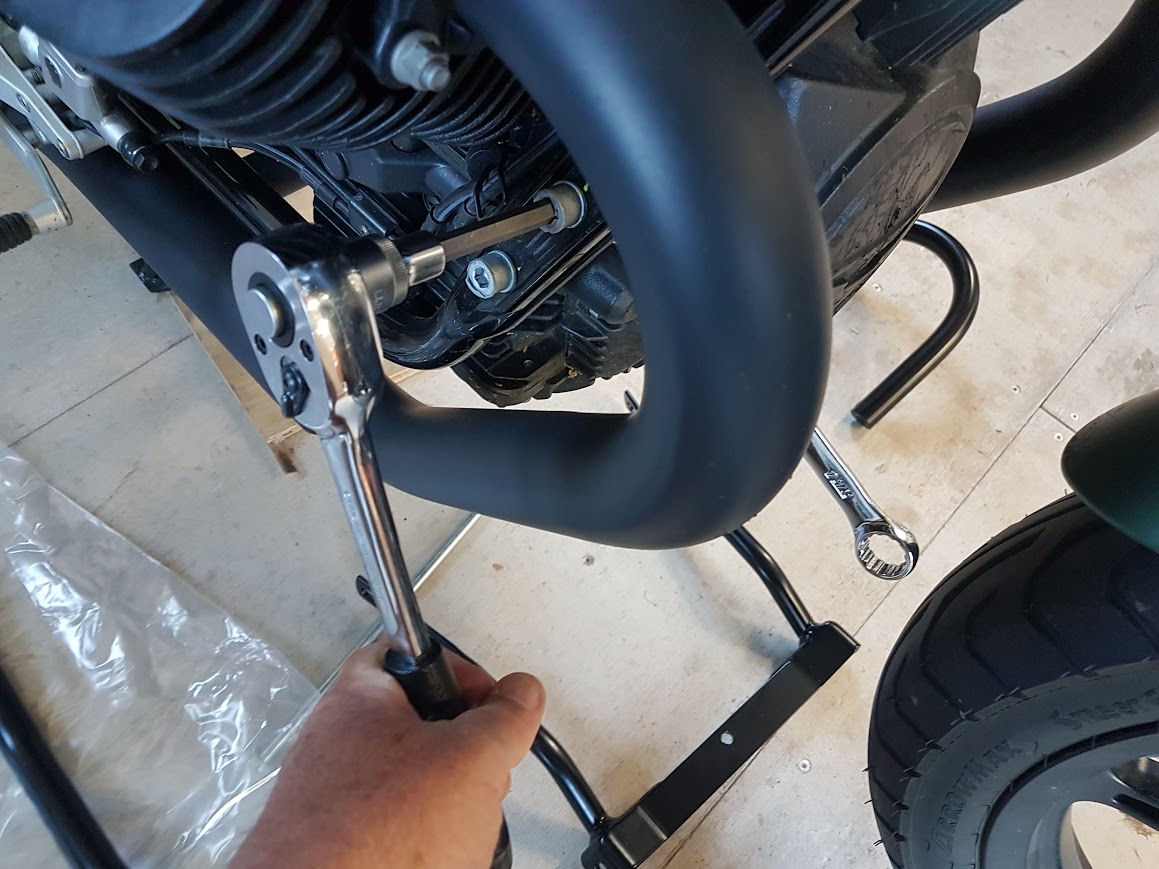
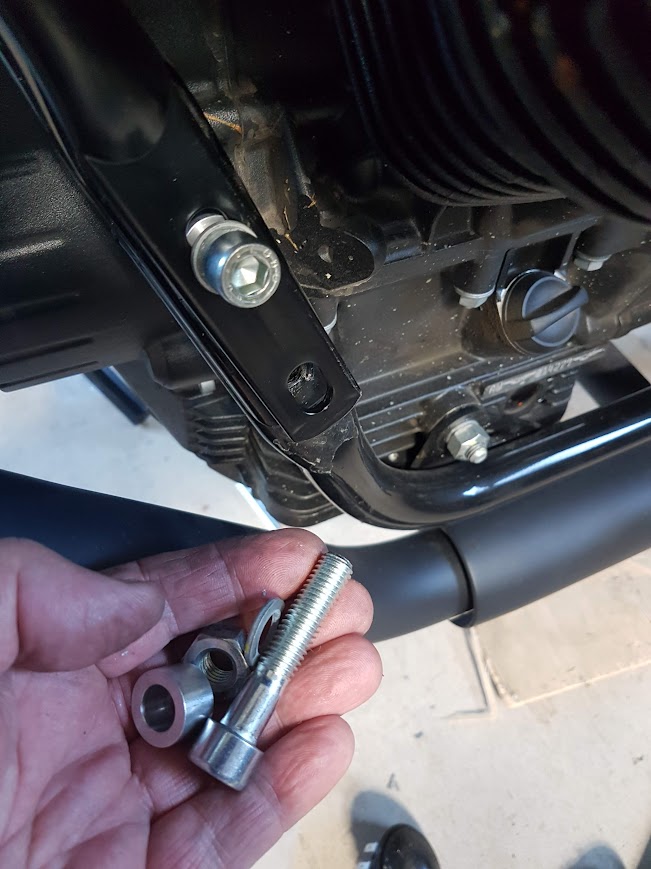
Now for the engine support bar. Undid the nut and tapped the bar out using the provided longer bar as a drift. It came our smoothly. Took the new bar out, placed the crash bar on and tapped the new bar through to the other side. No drama. Placed the other crash bar on and the nut. Easey-peasy.
Swung the crash bars up and attached them to the centre piece. At this stage, nothing was tightened.
Sat back and admired my skilfulness. Then tightened all the nuts and bolts. I relocated the horn to the crash bar; there was just enough free play in the two wire connectors.
My only complaint with the kit is the quality of the bolts. It requires the original nuts and washers to be reused. I found that the nuts would start OK but then bind up on the threads further along. Even with a dab of grease, brute force was required to tighten them.
Otherwise, I like the look of the bars. They are subtle and not garish.
I bought this V7 second-hand last year to replace my Breva 1100. The Breva was starting to feel too big but the V7 is just right. I ordered the OEM centre-stand from the Moto Guzzi Online Shop in Germany, unable to find one in stock locally. I’d ordered my windscreen from them last year and found them very efficient. The stand took longer to arrive but there weren’t any hassles.
The stand comes with instructions which were quite clear and unambiguous. I also searched the web and found these helpful photos and hints by danketchpel on the Guzzitech forum.
First job was to fit the springs. Even with a spring puller this was a bit of a task. I clamped the stand in the vice and, with the spring puller and some extra leverage from a pair of pliers, they eventually were in place.
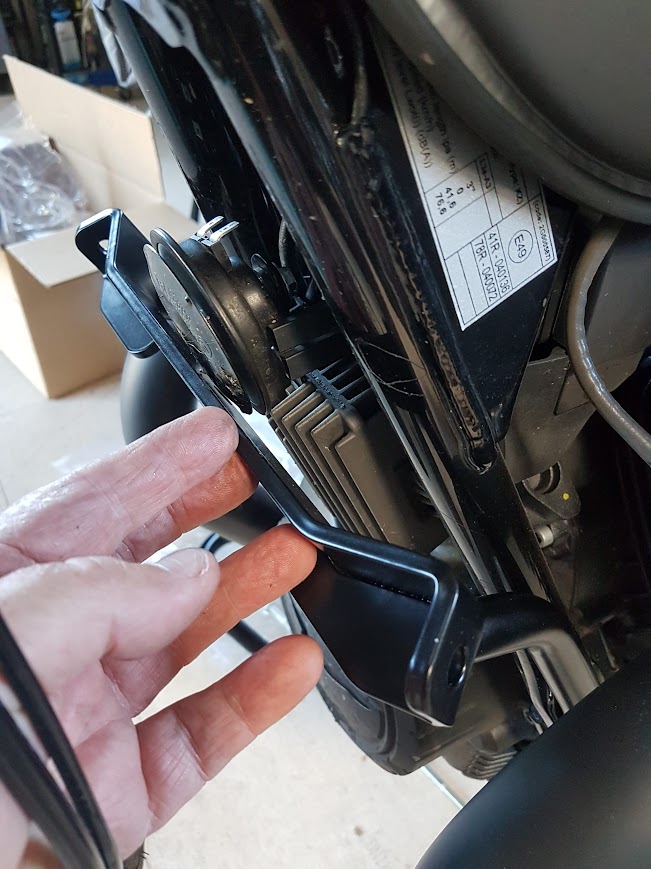
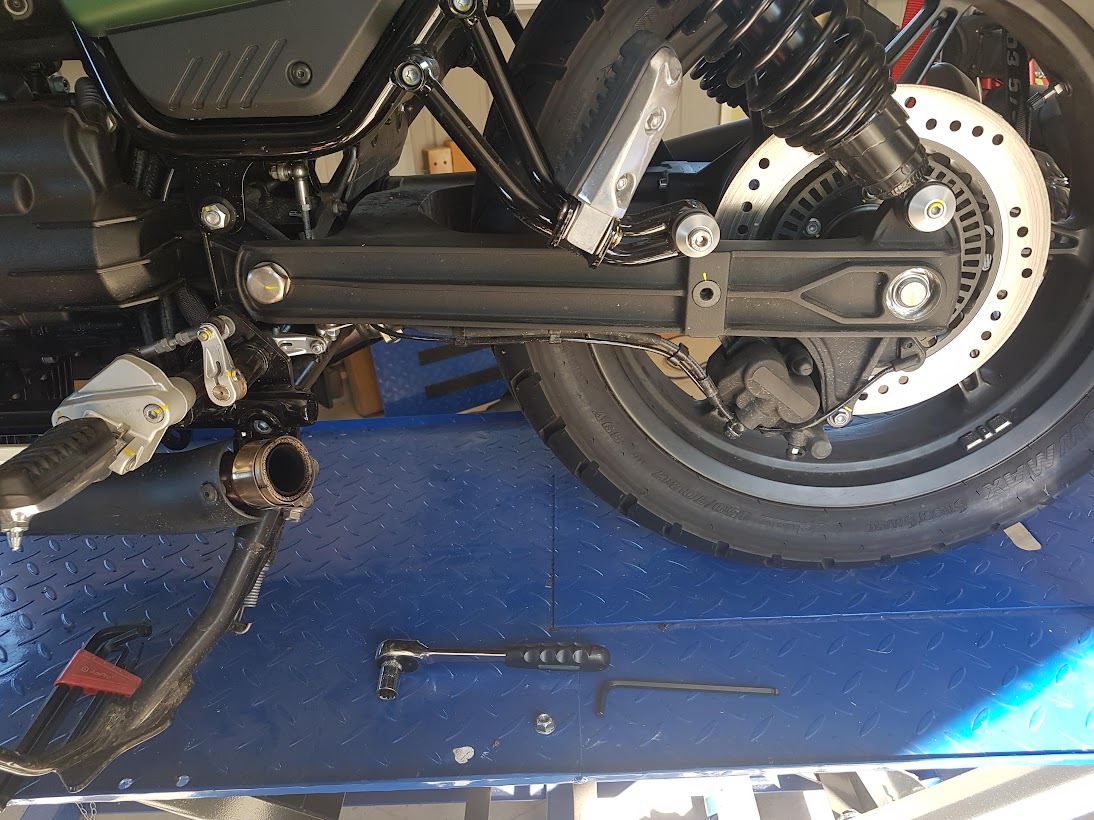
I found that I had to remove both mufflers for ease of access. Also I had to rotate the RHS heatshield to fit one of the stand’s bolts. Judicious use of a crowbar was needed to remove the cross-frame piece and to insert the stand’s replacement. A bit of juggling and cursing saw it all fit in – not something I’d want to do without the table lift.
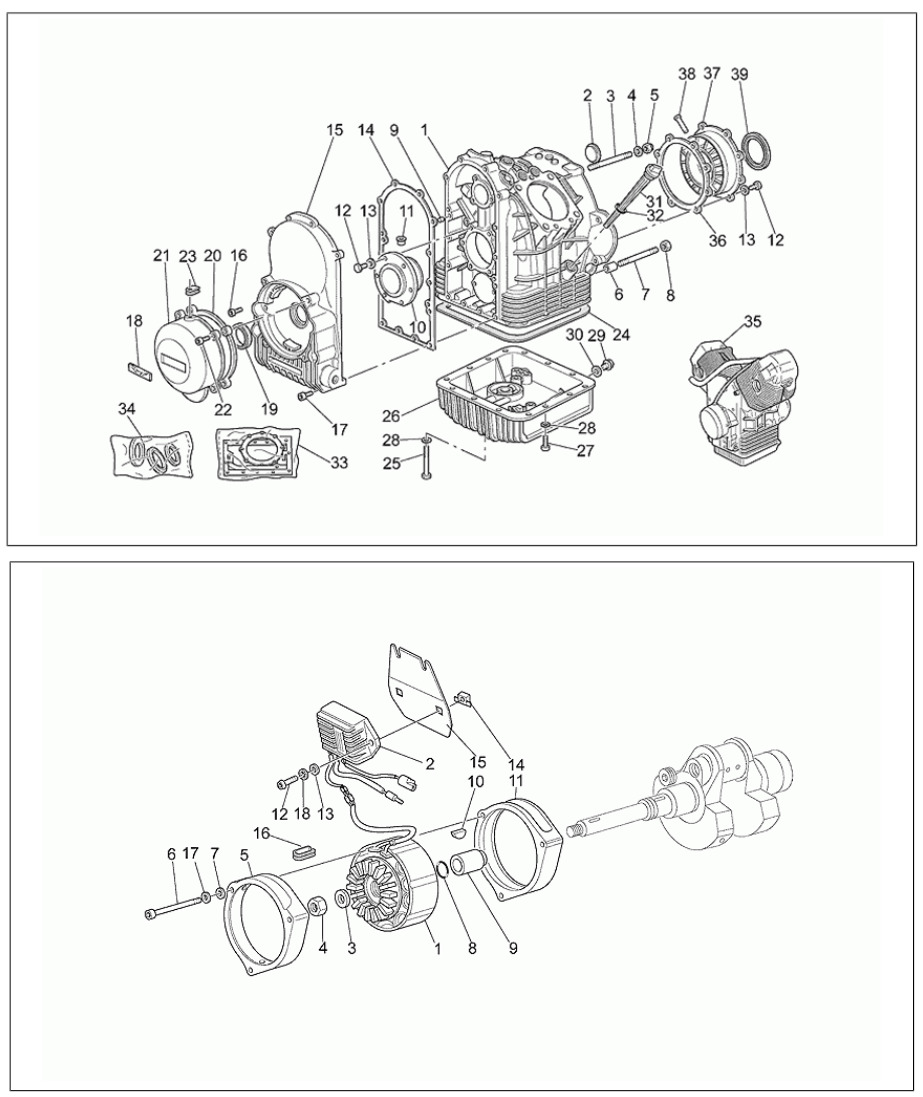
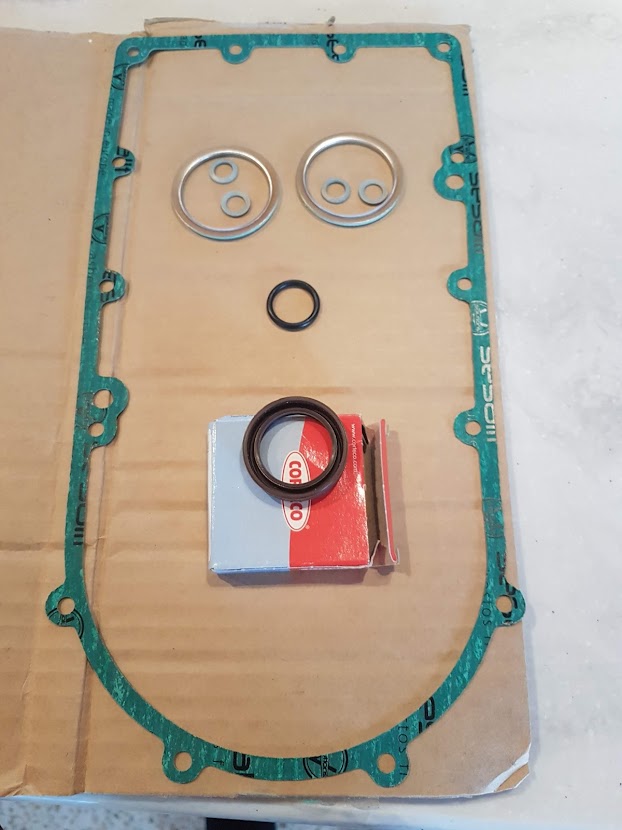
No sooner had I repaired the fuel indicator and timing sensor leaks, it became apparent that I had another leak. Oil seem to be coming from the front-right of the engine and spreading under the sump as I rode along. It didn’t drip on the floor but it bugged me. I hoped it was the sump gasket so I replaced that and did an oil change. But it didn’t fix the problem. I searched Google and the forums – it wasn’t an uncommon problem but details for getting in there and fixing it were scanty. I spoke to a few bods – Peter Roper at Moto Moda, Mario at Thunderbikes in Perth, and Bill Finegan at Hpower (who lives up the road from me). They thought that I should be able to do it myself…gulp! After reading all I could and scanning the parts diagrams, I ordered from Thunderbikes a new timing cover gasket, an alternator seal and O-ring, two gaskets for the headers and new washers for the header nuts.
From the Guzzi/2001-2002evandtouringpartscatalog.pdf.
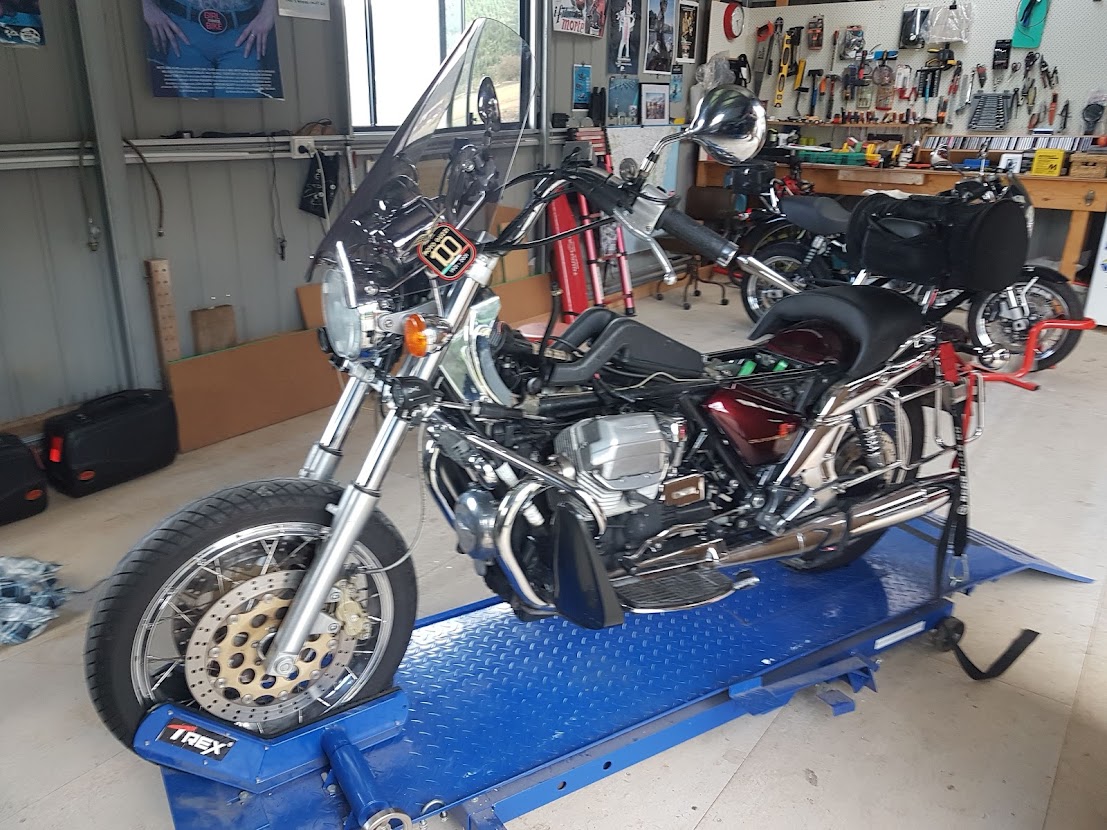
After removing the tank and battery to reduce weight, a neighbour and I pushed the big girl up onto the ramp.
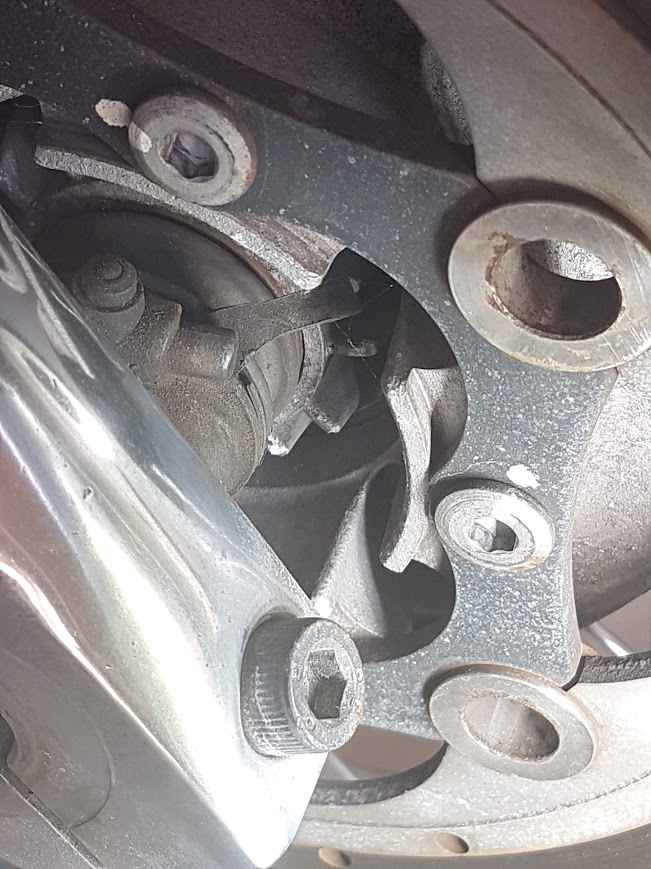
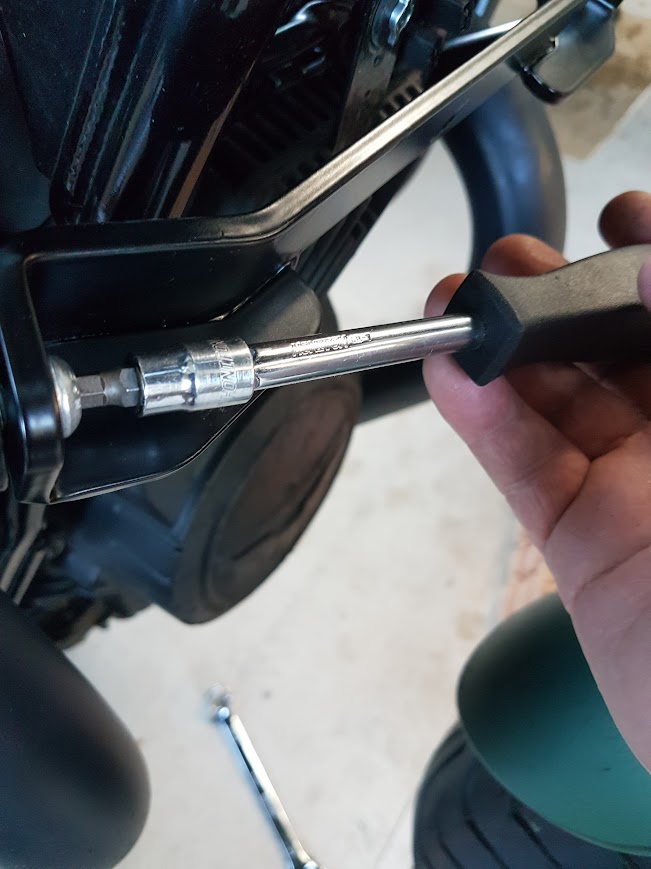
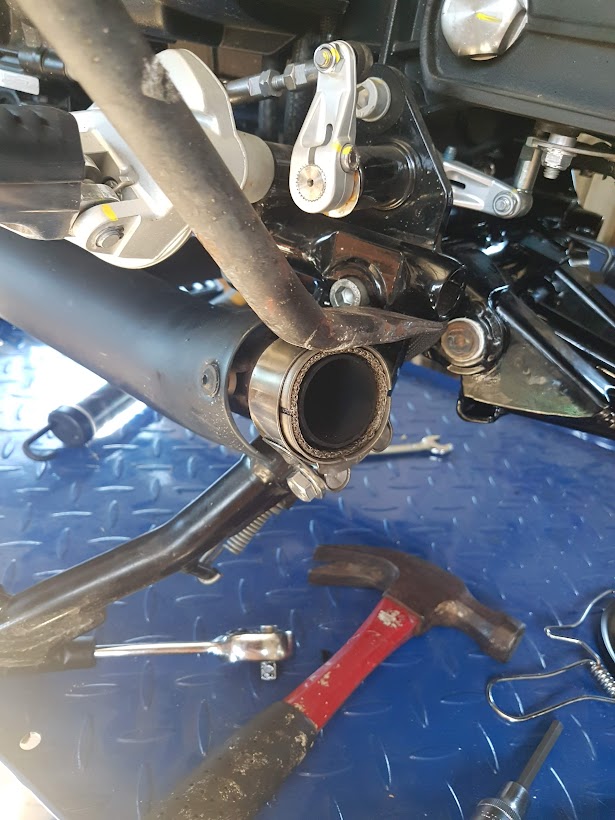
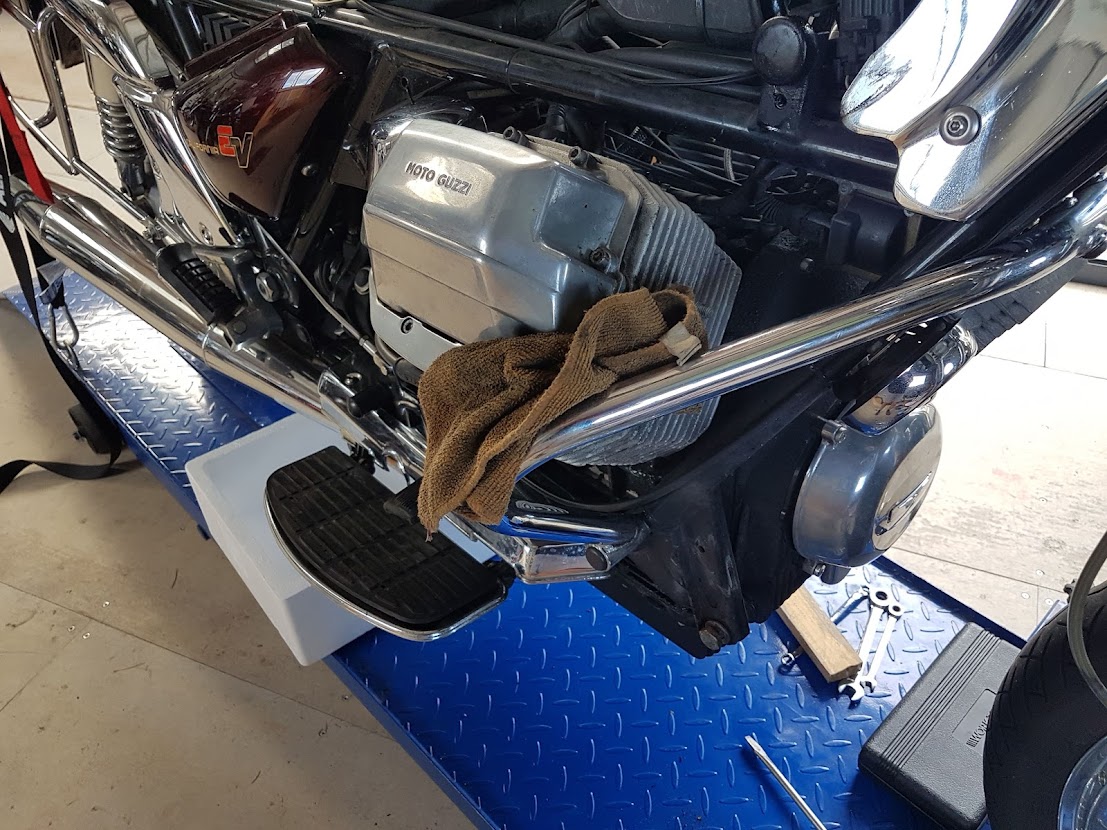
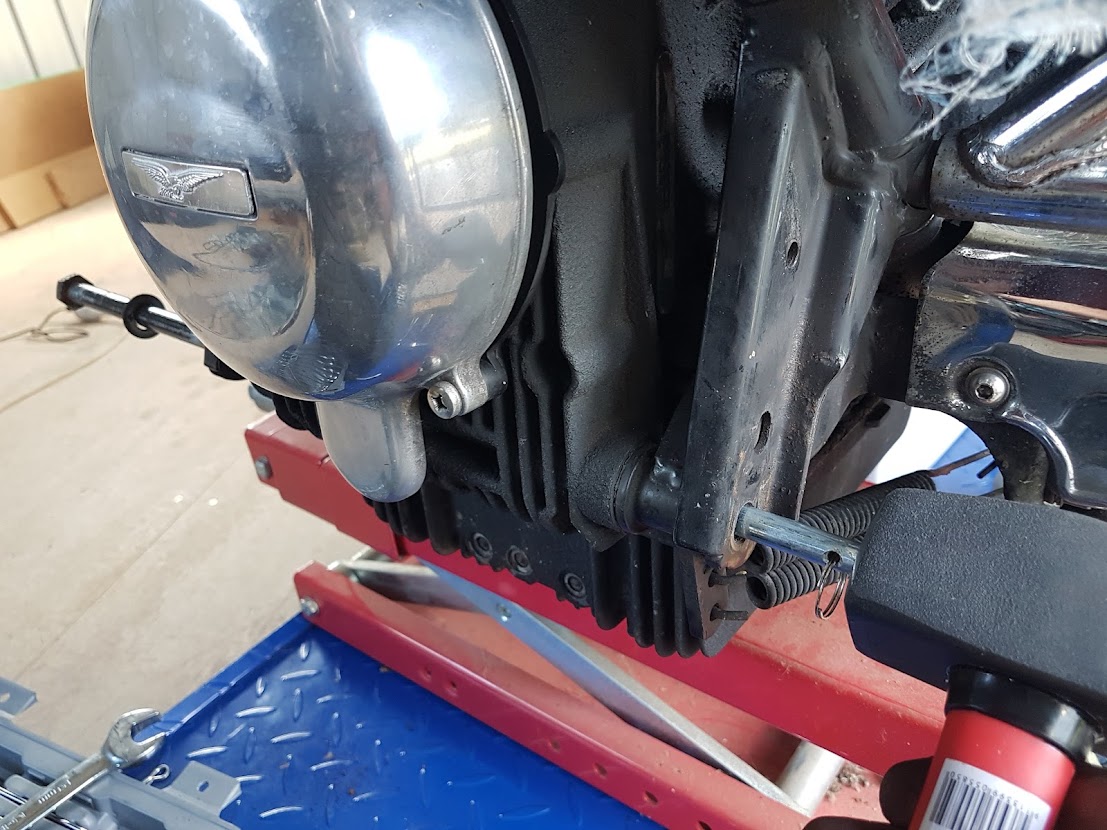
To remove the main frame bolt which is passes through the bottom of the timing cover and the engine frame, I had to remove the exhaust headers, which meant removing the toe covers.
I supported the engine with a jack to take some weight off the frame, then used a short rod and tapped the frame bolt out. It came out easily.
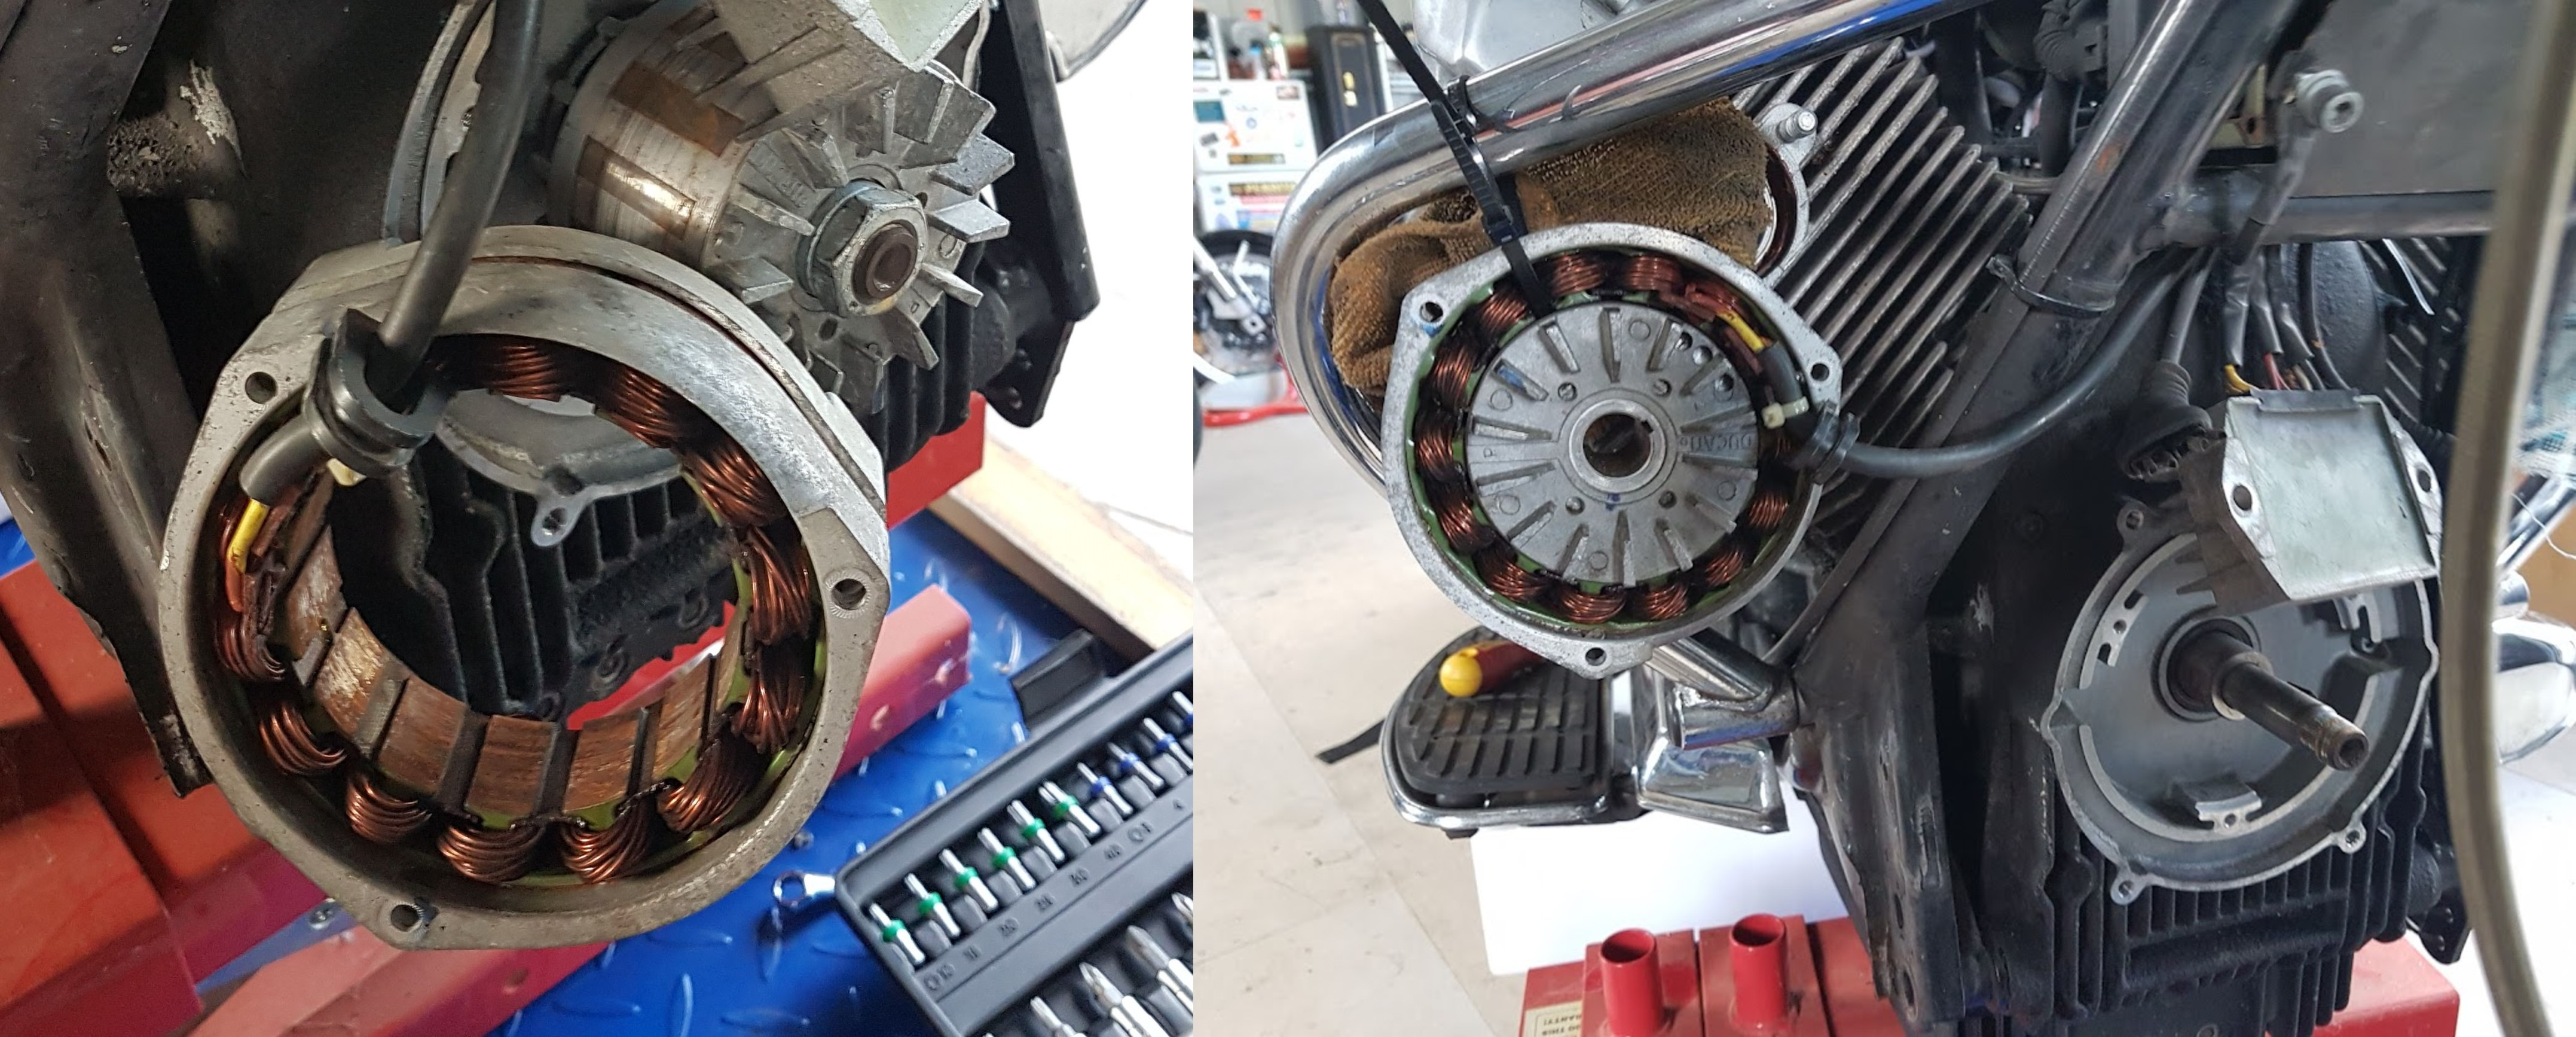
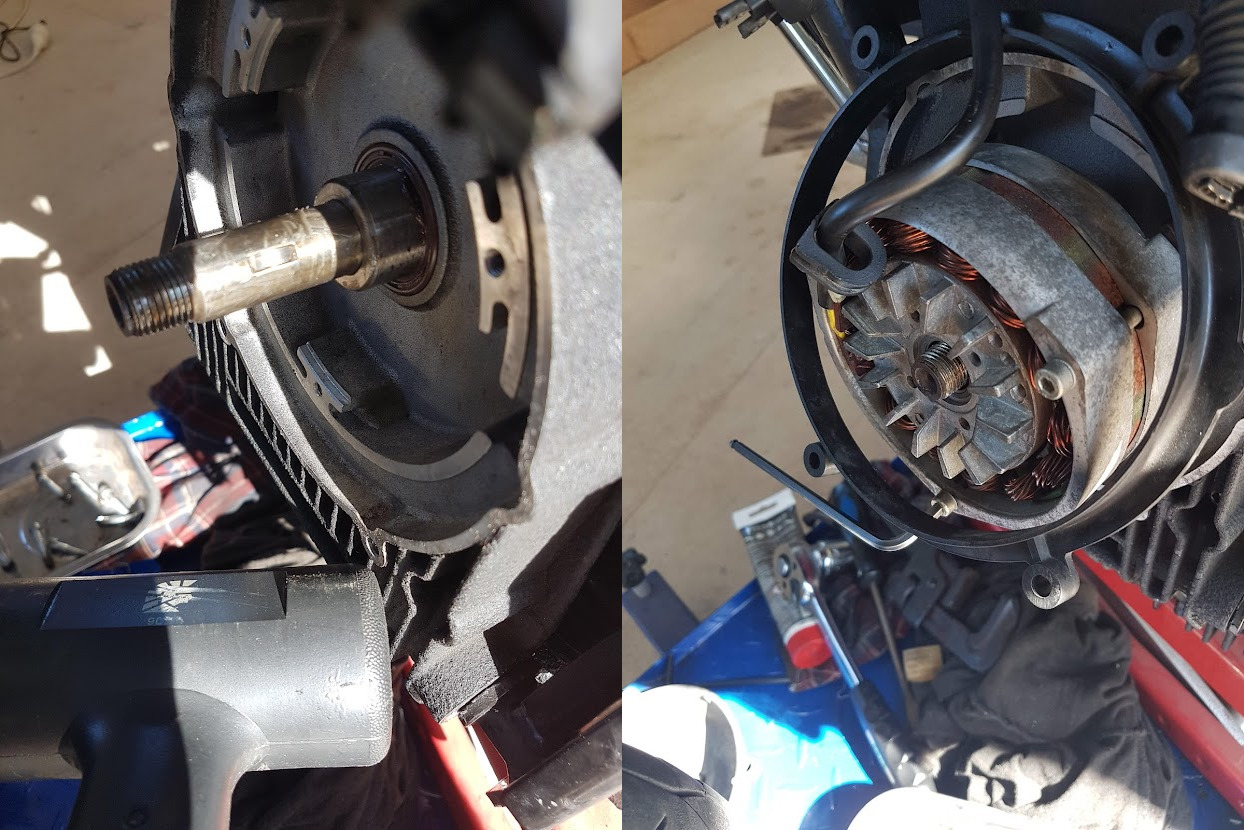
Removed the alloy alternator cover which exposed the alternator. Three bolts held the stator on so removed this and swumg it out of the way, still attached to its electrical cable.
To undo the nut holding the alternator to the crankshaft, I first removed the rubber bung from the side of the engine and inserted a screwdriver in to flywheel teeth to stop the engine from rotating and tried to undo the nut. Nope, more leverage required so I used my Stilson pipe wrench as a breaker bar on my spanner…and she came undone smoothly. Some useful advice for all this came from Mike’s Machines.
The rotor slid off with a bit of a wiggle. It’s held to the crankshaft by a “woodruff key” for which the rotor has a slot to slide on (No. 10 in the lower parts diagram). I placed the rotor in the stator and cable-tied them to the crash bar.
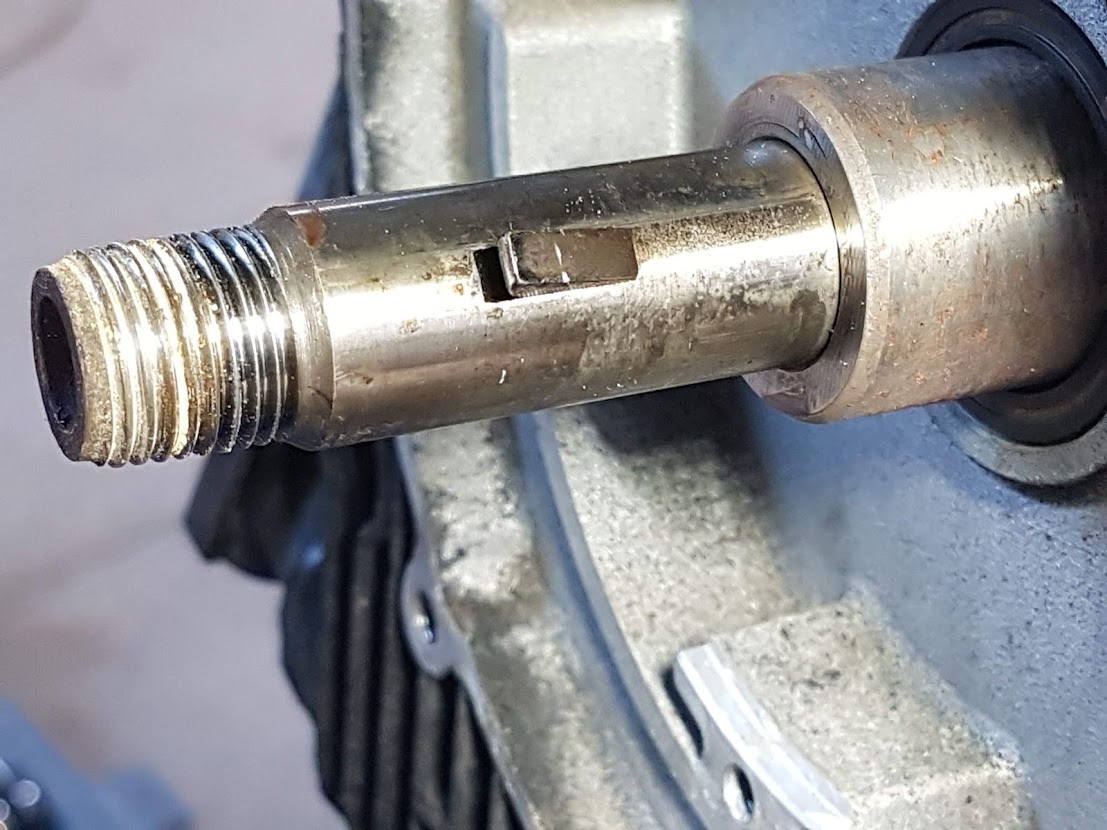
No sign of oil, so the seals had done their job.I used a small chisel and hammer to extract the woodruff key. The cover, spacer and seal (visible to the right) wouldn’t slide off with the key still there. Don’t lose the key! (You can buy a new one from industrial suppliers).
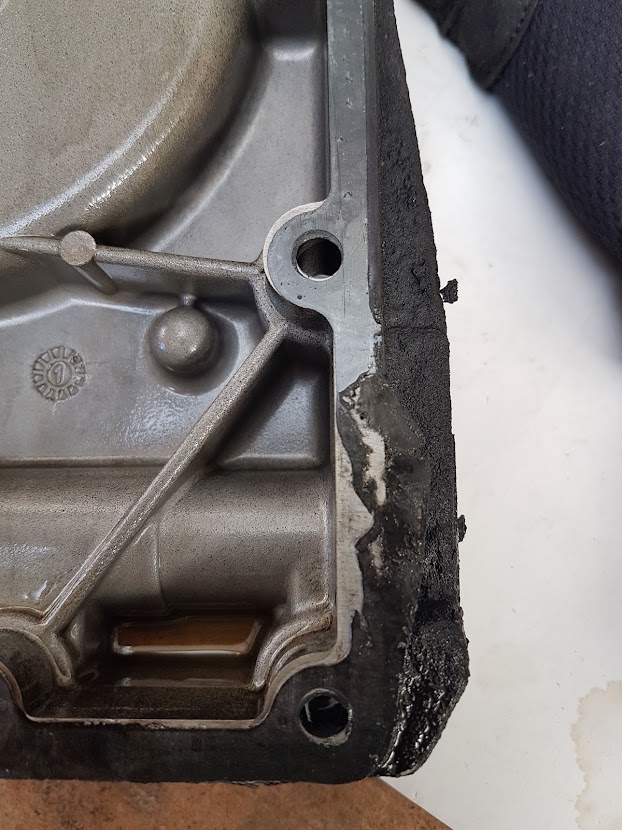
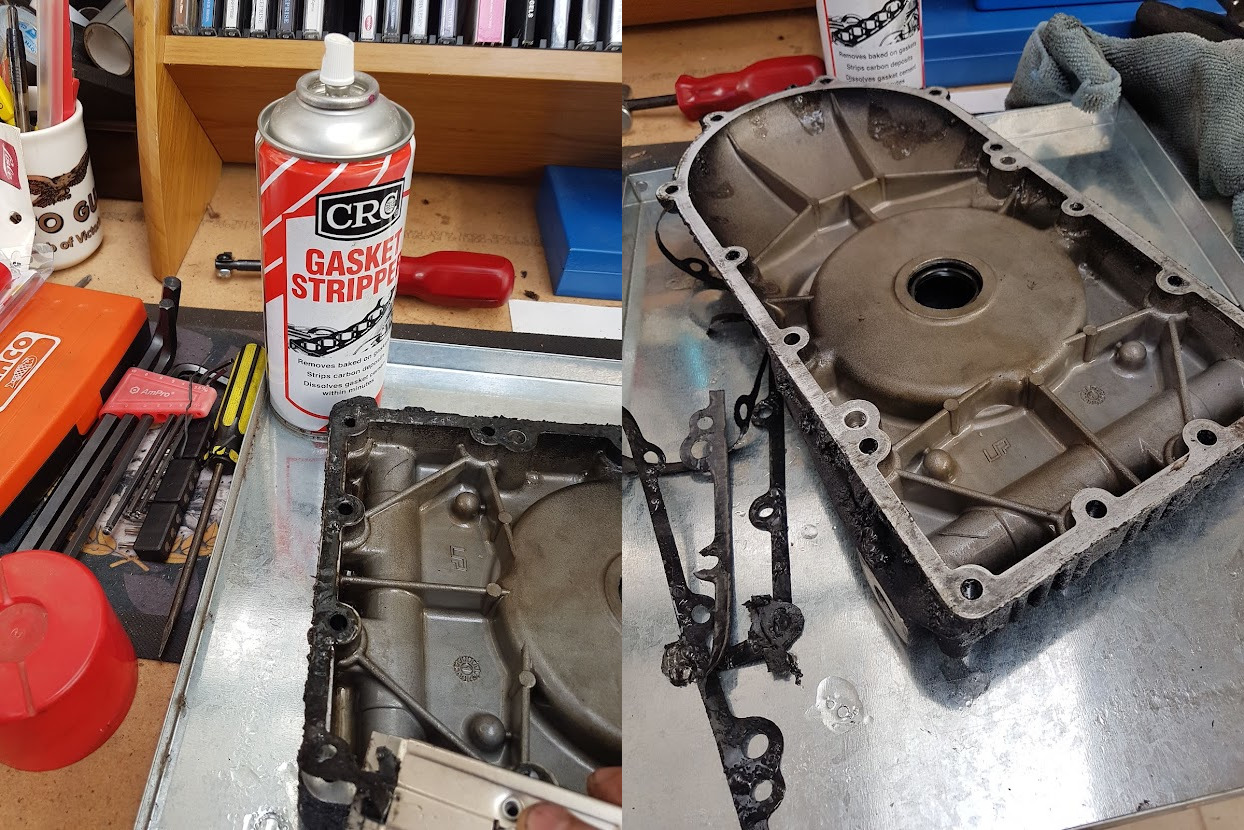
Removing the cover was straight forward, too, though I had to move the horns and the voltage regulator/rectifier out of the way to allow access to the top screws. I noted that the four lower bolts were longer than the rest. The cover came off without drama, the seal sliding over the oily crank. I levered off the base, where it attached to the frame, with a screwdriver. What I didn’t foresee was the cupful of oil that drained out all over my bike lift!
The cause of my oil leak was immediately apparent. This was a relief because I was never certain of the reason for the leak.
I hit the old gasket with CRC Gasket Stripper and 10 minutes later it peeled off easily with a scraper.
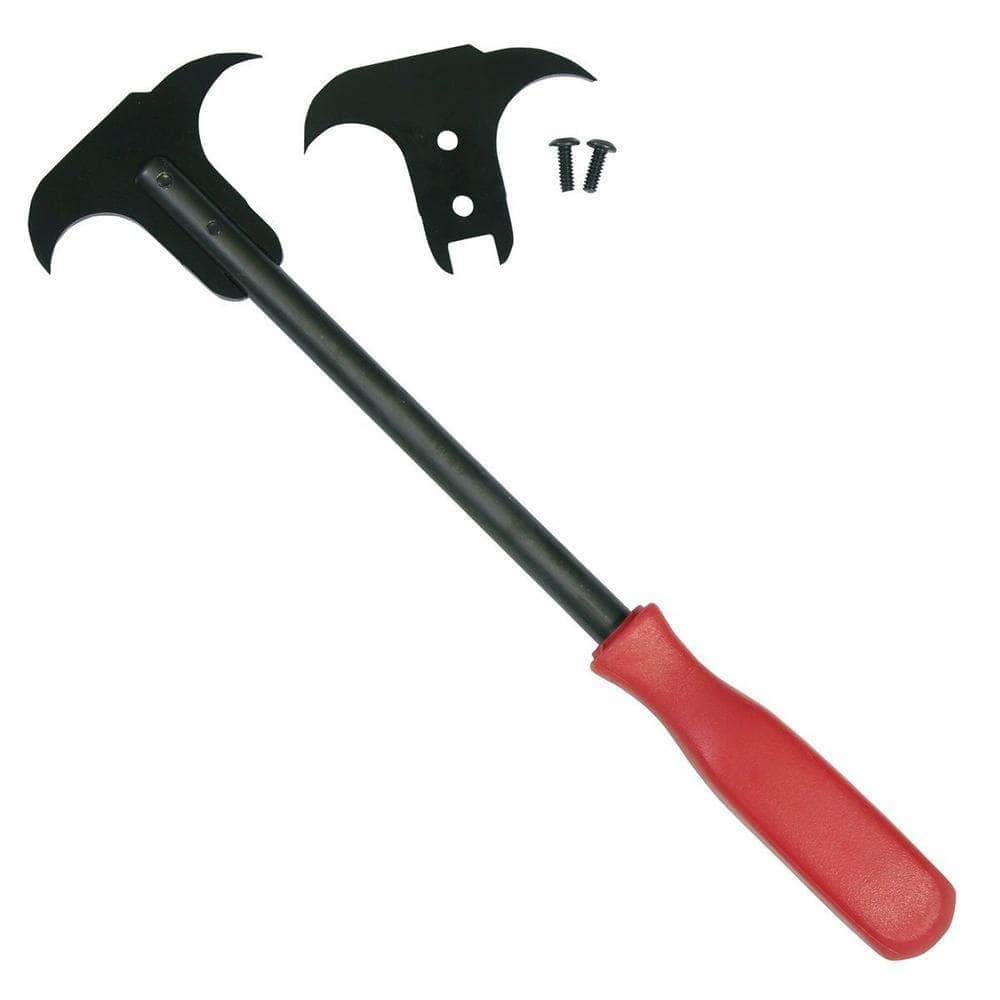
The old seal proved difficult to remove and I was wary about damaging the surface. My el cheapo seal removal tool wasn’t up to the task and grappling with a screwdriver ruined the seal but it didn’t budge. It had been on there for 20 years or so. Down my street, Fritz serviced and repaired ride-on lawnmowers in his shed so I walked down there to see if he could help. Using a seal remover tool which looked similar to a one-fork claw hammer, he removed it with one swift movement.
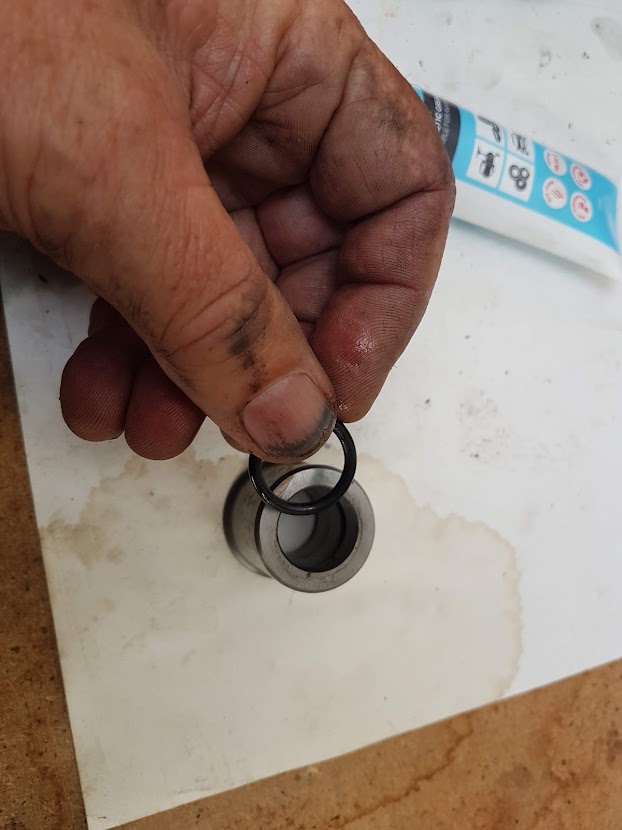
I slipped the metal spacer off, picked out the O-ring and inserted the new one with a smear of silicon grease. It fits into the groove visible inside the spacer. It was simple to replace.
I cleaned both surfaces of the engine and timing cover and applied a thin smear of grease to them. Placed the new gasket on the engine, held in place by the grease smear.
The cover went back on smoothly; I had to tap the base with a rubber mallet to get it into the lower frame. I feared that the cover and frame holes might not line up so got down on my knees and eyeballed it. Perfick! I now eased the seal onto the spacer and slid the metal spacer and seal along the spindle and through the hole in the cover. Normally I would use an appropriate sized socket to seat the seal but none was deep enough go over the spindle to the seal, so I tapped the seal into place using a rod until it was completely and evenly fitted. Screwed the cover bolts back in then inserted the engine frame bolt and tapped that through with a hammer. No probs! Tightened them up (then realised that the frame bolt would need to be loosened to accommodate the toe cover supports).
A dab of grease, then I tapped the woodruff key into the spindle with a hammer. Lined up the rotor’s slot with the key, and she slipped on over the greased key and spindle like butter. Put the stator on and screwed it down. But I forgot the plastic spacer, which needed to go in before the stator due to the wiring, so undid the stator and slipped the black spacer in.
I inserted my screwdriver in on the flywheel teeth and tightened the nut holding the alternator to the crankshaft spindle, using my Stilson for extra leverage. On with the alloy cover. Job done! A few odds and ends to tidy up – horns, toe covers, exhaust headers, etc.
This is the deepest I’ve been into an engine. I was impressed with the simple design and construction of the Guzzi engine. I suspect that it’s a 2-hour job for a skilled mechanic. I took 4 days!
I’d noticed an occasional petrol smell around the Cali. One day while cleaning it, I detected a slight sheen on the cable coming from the fuel-level indicator where it exits the tank near the fuel solenoid. I put up with it for a few weeks but it developed into a slight drip, so time to do something.
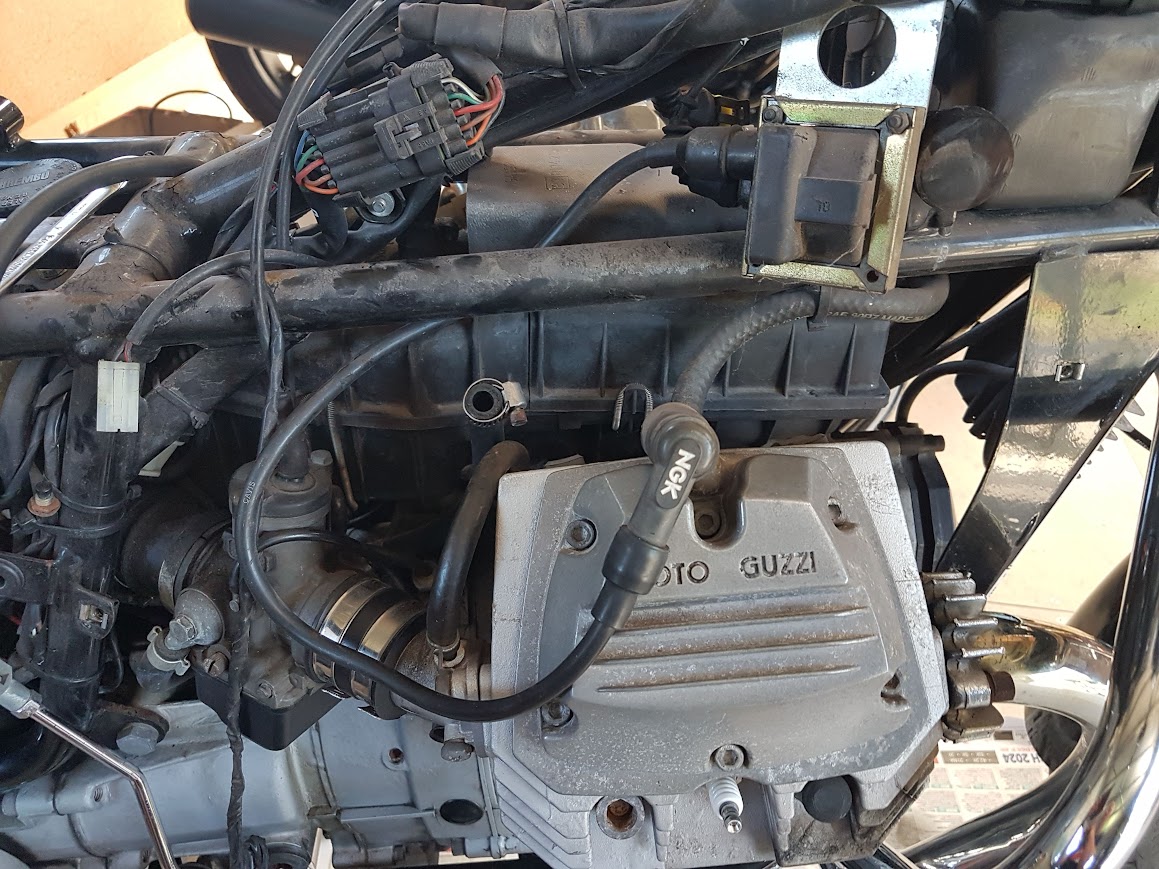
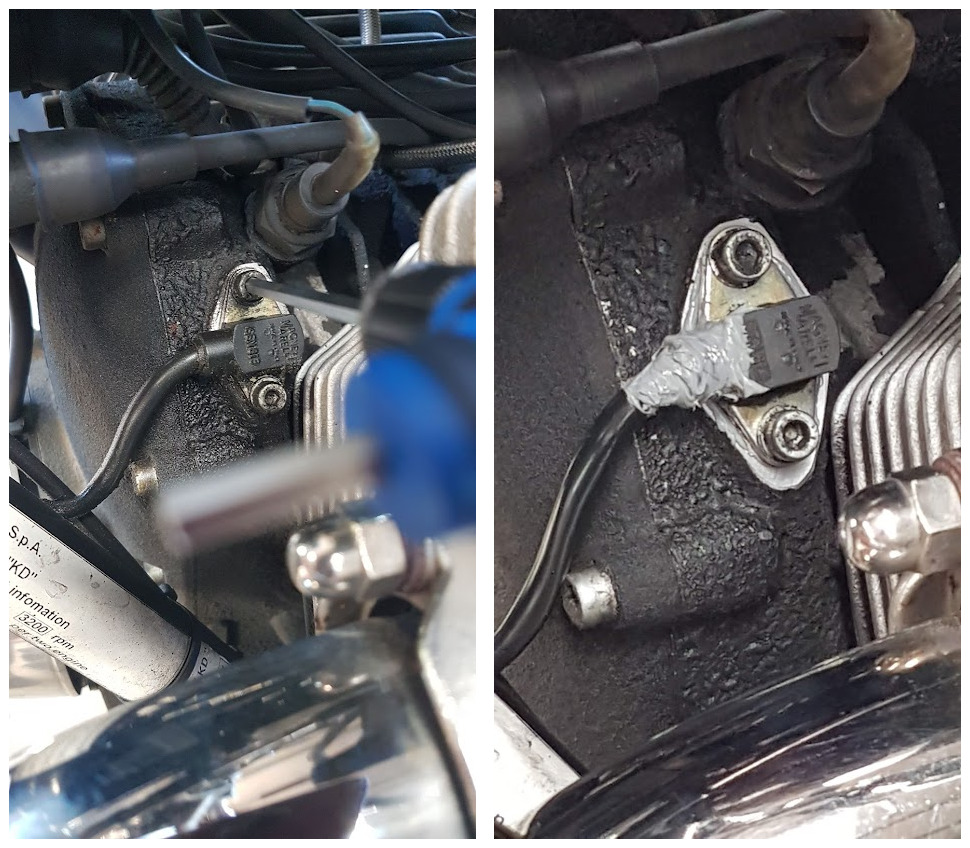
In addition, the timing sensor in front of the left-hand cylinder had been weeping for some time, a not uncommon occurrence. I searched the Moto Guzzi forums for information, of which there was plenty, and got stuck into it.
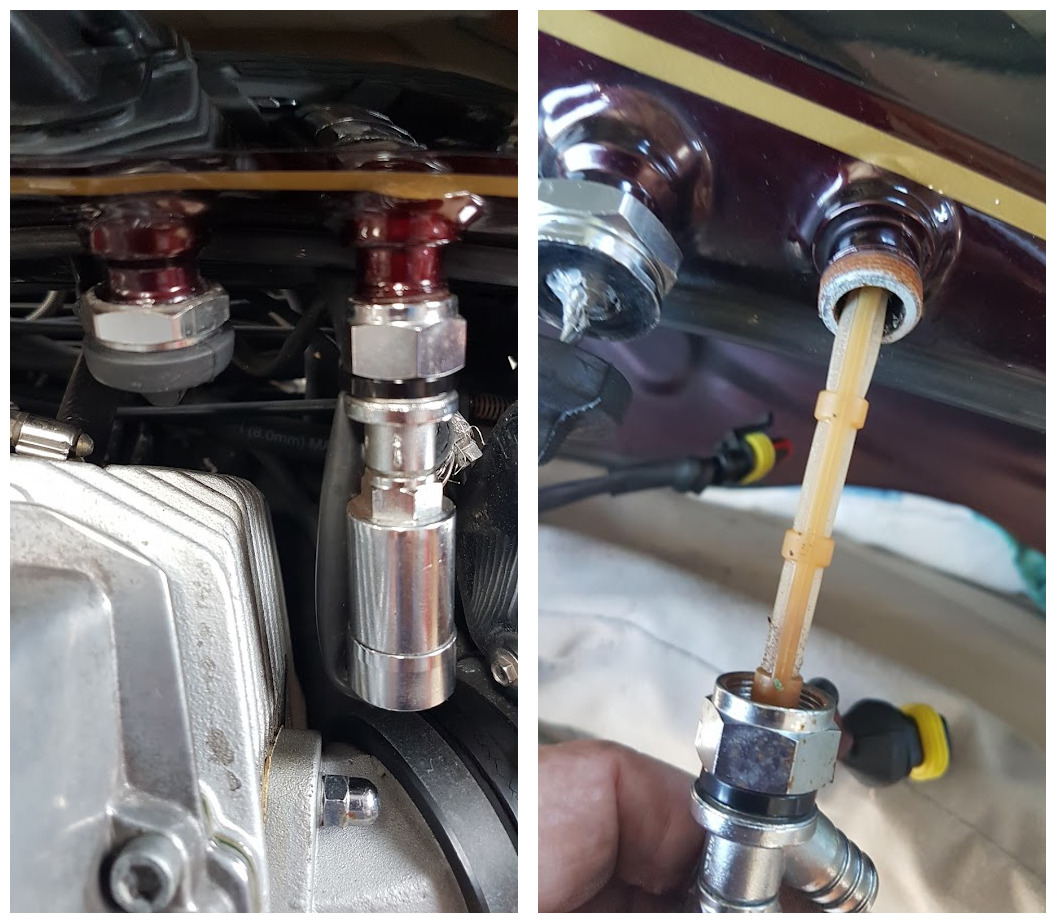
Firstly I had to drain the tank of 15L of petrol, then remove it from the bike. I pumped it out into a 20L container – man that’s heavy, which you don’t appreciate when it’s in the bike. Removing the tank is fairly straightforward; undo the retaining bolt under the seat, pull the tank back off its locating bungs, unplug the electrical cables to the solenoid and fuel-level indicator (it helps to prop up the tank with a block of wood to do this), undo the hose to the fuel solenoid, undo the hose to the pressure regulator at the front, lift the tank up and remove the overflow hose underneath, and carry said tank to somewhere soft where it won’t get scratched.
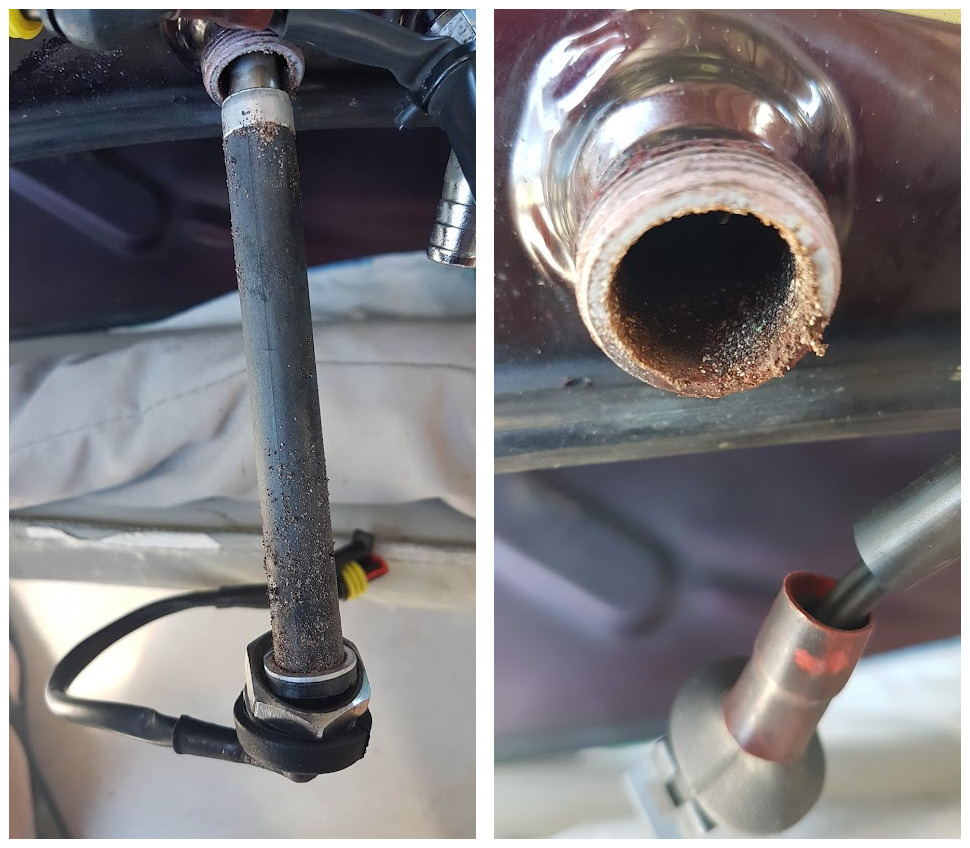
I’d never removed the fuel-level indicator before. It unscrewed easily and I extracted it.
After 20 years, there was a fair bit of grit on it and the union which brushed off easily. It didn’t look like rust. But now I was bit concerned about the fuel solenoid, too, so I undid and extracted that.
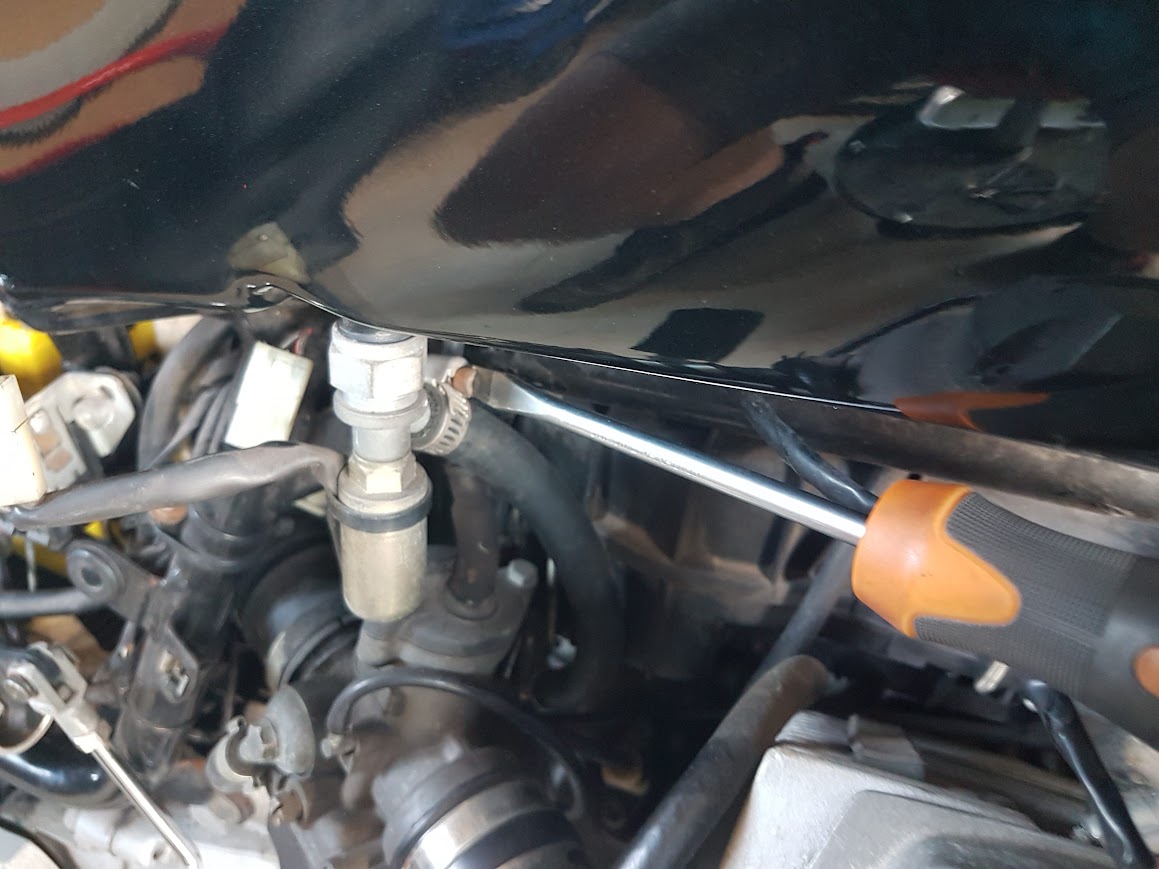
This was gritless! Beats me. The solenoid union nut is is designed to screw into the tank with a normal RH thread AND screw down the fitting at the same time with a LH thread to draw it up tight. I couldn’t get it to work properly until I’d removed the black cable-tie which held the electrical lead in place. A dab of grease on the tank thread and it screwed back in like a charm.
I eased the rubber boot away from the fuel-level sensor and squeezed some Threebond 1211 around the electrical wires exiting the base. The label says that it isn’t recommended for petrol, but they say that breaking the speed limit isn’t recommended, too, don’t they?! But it is OK with oil, and I’d bought it to fix the timing sensor leak. (The leak is also possible from the threaded join and some have found a slight split in the tank).
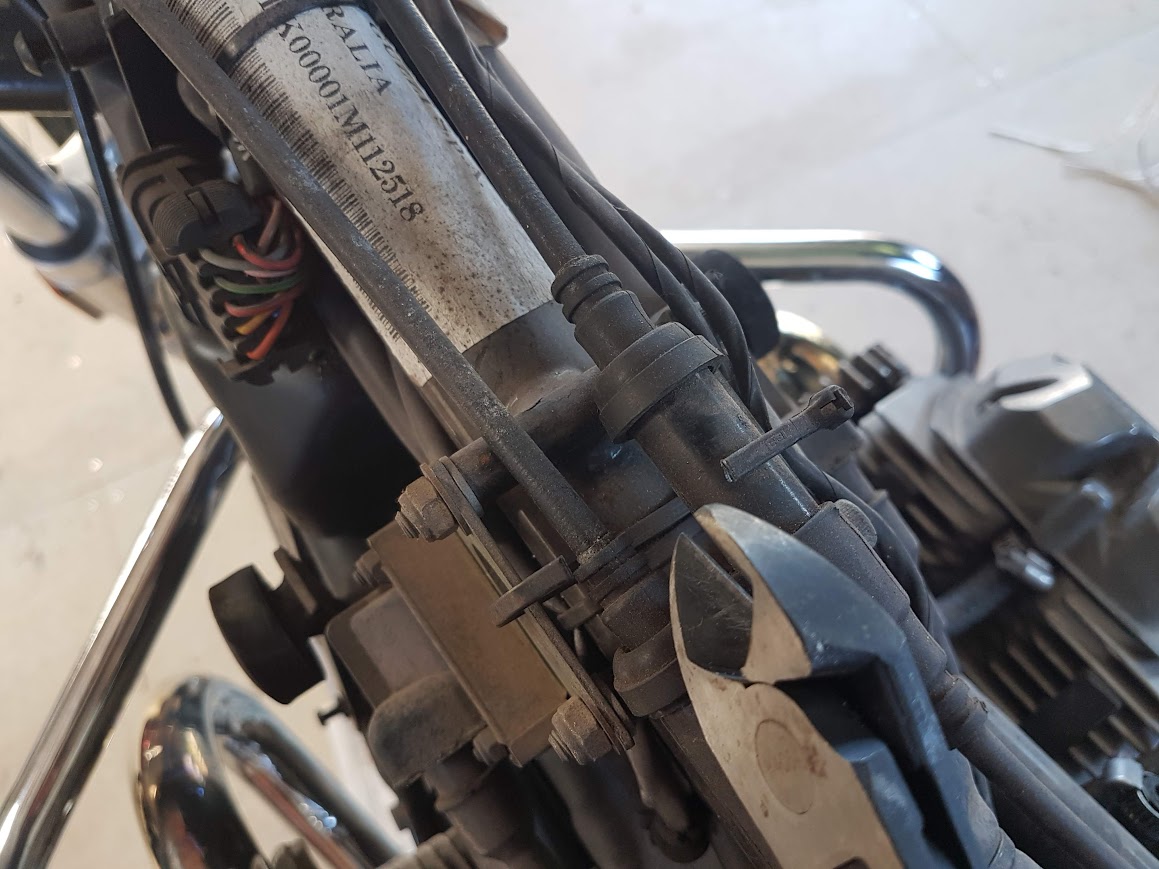
The timing sensor can leak where the sensor is screwed to the engine block, or out of the sensor itself. I extracted the sensor and found that the cable was grotty with oil and gunk, suggesting that oil was leaking out through the cable join. Cleaned it up with degreaser and then with methylated spirits. It has a spacer to ensure the correct positioning in order to read the crank rotations and an O-ring. Reinstalled these to the sensor then applied Threebond to the base-plate spacer, coated the area where the cable exited, and screwed it back onto the engine.
I poured some fuel into the tank and left it overnight. No leak. I smeared some rubber grease onto the locating bungs and eased the tank back on – the grease makes the job much easier – and reconnected cables and fuel hoses.
A week later and few hundred kays, all seem ship shape and Bristol fashion.
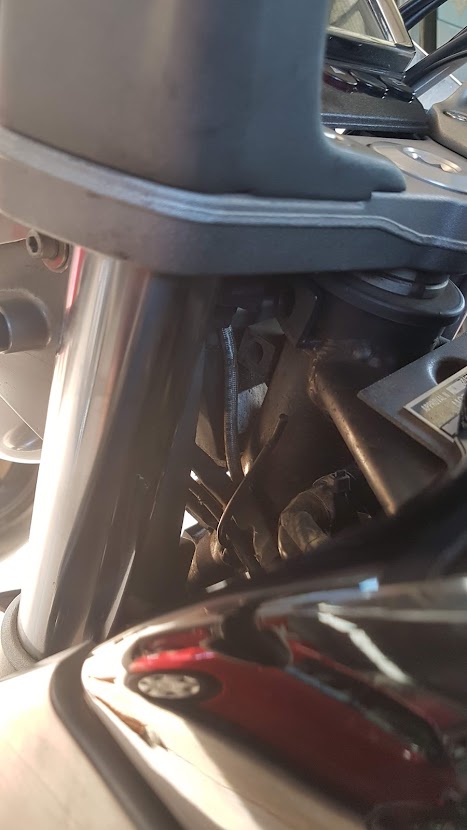
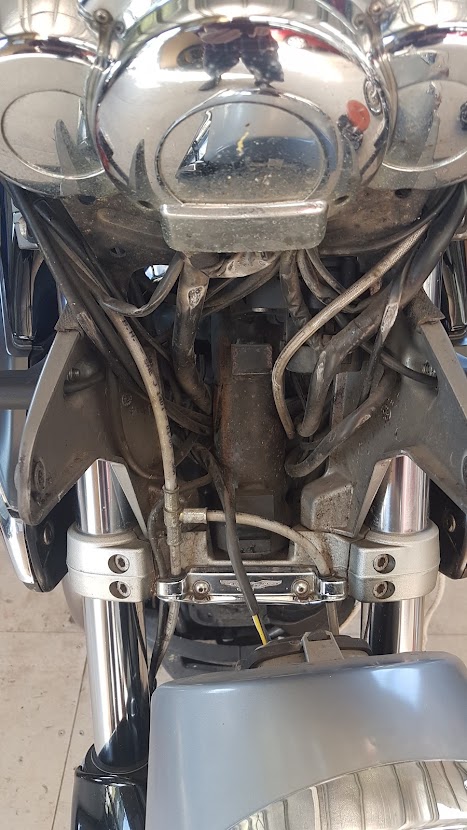
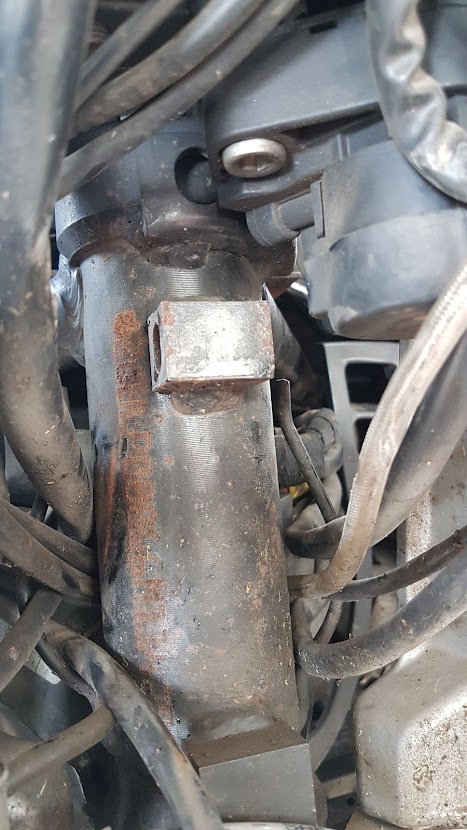
After my trip to Tocumwal Aviation Museum, I was sitting on my shed stool checking the Breva’s engine oil when my eyes passed over the tank to the steering stem where I noticed a brake line chaffing against a sharp steel edge. As I moved the handlebars, a right turn dragged the line across the corner of the steel block.
I removed the windscreen and headlight to gain access to the area.
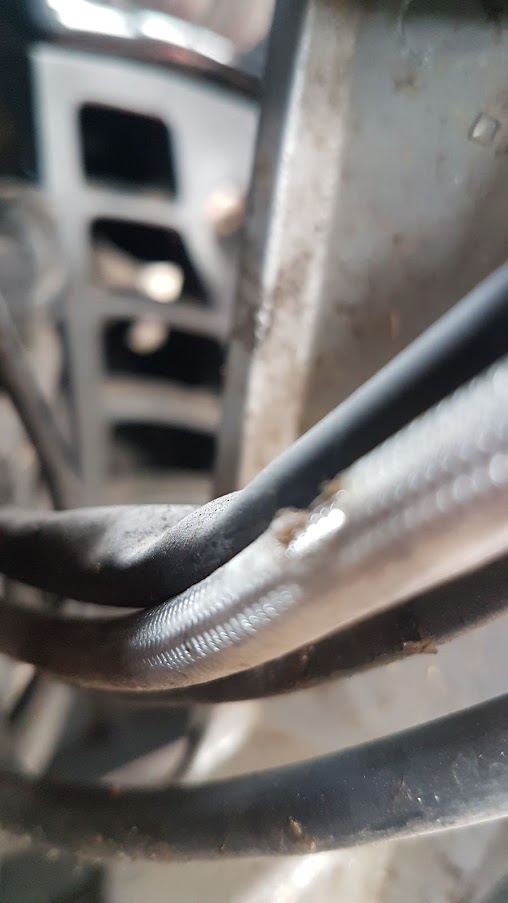
The line was, in fact, the clutch hydraulic line. The steel had cut through the outer layer of the line. I couldn’t see any purpose for the steel protrusion, though one lower down on the stem worked as the left-right steering stop. Perhaps the upper one was a vestigial from a previous Guzzi model and now functionless.
This was my error. Some years ago I’d removed the headlight to replace the globe. In ignorance, I’d pushed the headlight binnacle back into place without considering the routing of the clutch line and electrical cables. It was now clear to me that the lines should be moved to the right (as facing the bike) and that the headlight binnacle shape would hold them in position, away from the steering stem.
That’s why I like doing my own servicing. I have the chance to look things over and understand the logic of it all. Sure, I make a few mistakes but that’s all part of learning.
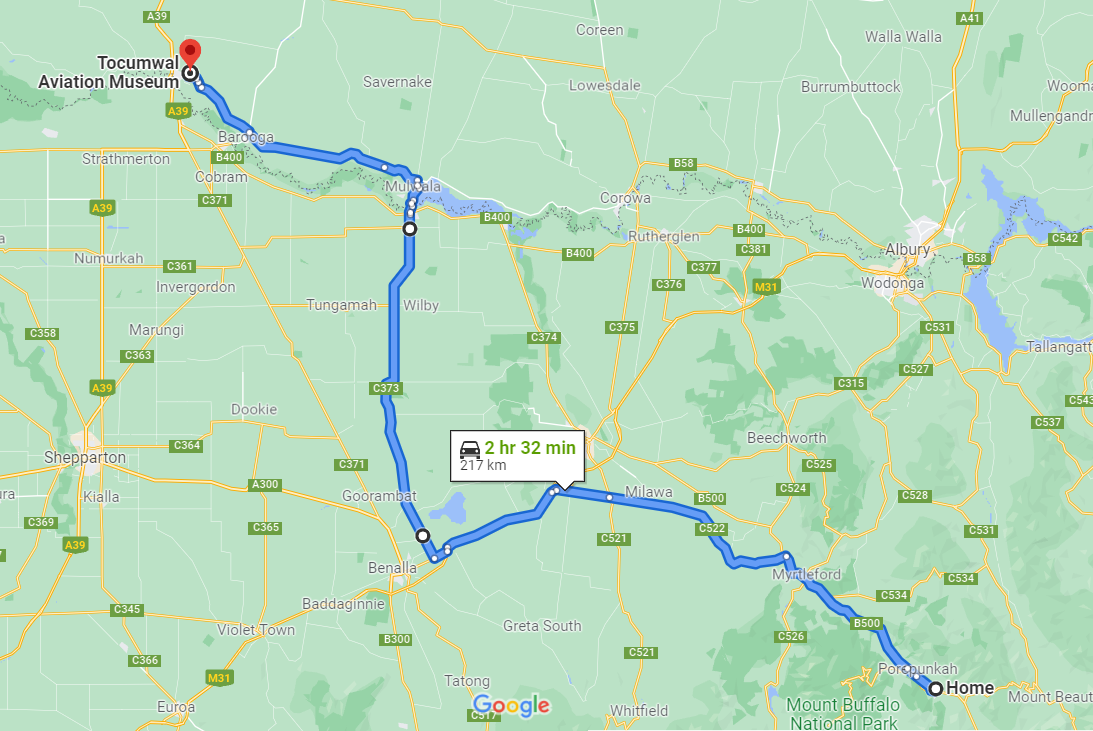
With Covid restrictions being lifted, I decided to fang the big Breva 1100 up to and over the border to Tocumwal. The new aviation museum was the drawcard. RAAF Station Tocumwal was established during WW2 to support Liberator B-24 heavy bombers and operational conversion.
Ran down the Snow Road towards Benalla then cut through miles of grain crops along the Benalla-Yarrawonga Road (C373) to the Murray River, the border of Victoria and New South Wales.
Crossed the Murray at Yarrawonga to Mulwala. Yarrawonga was chockas so thought I’d stop for a brew in Mulwala along the lake shore. But, alas, I couldn’t find anything resembling a coffee stop but saw a small sign to Tocumwal – had to chuck a U-ey because I went past it. This took me through a myriad of streets and onto a main road which I assumed went where I wanted. No signs!
Kept the sun off my right shoulder and rode for smegging miles without any sign or even a route name until I encountered Barooga and a sign to Tocumwal, my first indication that I was on the right track! At least the Breva has a big 22 litre tank!
On I went and had to chuck another U-ey because the (small) museum/airfield sign was right on the turnoff. Without any further signage, I meandered around and found the museum and café.
Needed a coffee by now but had to get though all the Covid check-in – the Victorian app can’t read the NSW app…what’s the matter with this frigging Federation!? And had a lovely ham/cheese/tomato sour dough sandwich and latte.
The museum had an interesting display of aircraft and story boards. A theatre ran a series of movie-tone newsreels from the ’30s to ’50s. There was a memorial wall to the men and women who had died at the airbase during WW2.
Backtracked out of the airfield to Barooga, where I crossed the Murray back into Victoria at Cobram. Fanged along to Yarrawonga. Gees, there’s a lot of houses gone up in these Murray River towns…and they’re all full of 4-wheel drives, boat and caravans. Where’s all the money come from?
Turned south for home but had a break along the way for a drink and an apple. Back home after seven hours.